Rendering Markdown Content
When your markdown content is requested through Tina's API, Tina serves a parsed AST (abstract syntax tree) version of the content.
The parsed AST gives developers the ability to step through each node, and render it with full control.
The below example has some sample markdown and associated AST.
This is how TinaCMS turns your markdown into structured data!Here is an image: 
{"type": "root","children": [{"type": "p","children": [{"type": "text","text": "This is how TinaCMS turns your markdown into structured data!"}]},{"type": "p","children": [{"type": "text","text": "Here is an image: "},{"type": "img","url": "/github-mark.svg",}]},]}
Inbuilt Markdown Rendering
Tina also provides a <TinaMarkdown> component, which renders your md or mdx component from the parsed AST without having to handle the data structure yourself.
It's as easy as passing in the markdown content via the content attribute.
import { TinaMarkdown } from "tinacms/dist/rich-text";const MyMarkdownBlog = (props) => {return (<><h1>{props.data.title}</h1><TinaMarkdown content={props.data.body} /></>)}
Styling Markdown elements
The <TinaMarkdown> component takes a components field, which takes a mapping of html element properties to react components.
When an element appears in the AST tree, it will be intercepted and replaced with the react component from the mapping.
const components = {h1: (props) => (<h1 style={{ color: 'blue' }}>{props.children}</h1>),p: (props) => (<p style={{ fontSize: '18px' }}>{props.children}</p>),};<TinaMarkdowncontent={body}components={components}/>
Customizing Built-in Markdown Elements
You can also use the components prop to customize more complex elements like code_block, image, or table.
For example, you can replace code_block with your own component to support Mermaid diagrams or style code blocks the way you want.
import { CodeBlock } from "@/components/code-block";import MermaidElement from "@/components/mermaid-element";const MarkdownComponentMapping = {code_block: (props) =>props?.lang === "mermaid" ? (<MermaidElement {...props} />) : (<CodeBlock {...props} />),};<TinaMarkdowncontent={data.body}components={MarkdownComponentMapping}/>
This replaces the default <pre> block with your own React components. You can now control the code output however you like. For example, you can add syntax highlighting, line numbers, or a copy button inside your CodeBlock component.
Here's a simple CodeBlock example that uses Shiki to highlight code and adds a copy button.
import { useEffect, useState } from "react";import { shikiSingleton } from "./shiki-singleton";function CodeBlock({ value, lang = "ts" }) {const [html, setHtml] = useState("");useEffect(() => {shikiSingleton.codeToHtml(value, lang).then(setHtml);}, [value, lang]);return (<div className="relative"><pre dangerouslySetInnerHTML={{ __html: html }} /><button onClick={() => navigator.clipboard.writeText(value)}>Copy</button></div>);}
MDX and Custom Elements
If you are using mdx as the format, you'll have the ability to define custom components that your editors can leverage.
How does MDX work with Tina?
Tina doesn't require a compilation step like other MDX tooling you
might be familiar with, so it needs to know about all the possible elements
you support ahead of time.
Instead of doing an import statement in MDX,
you need to register each element as a template in your Tina schema.
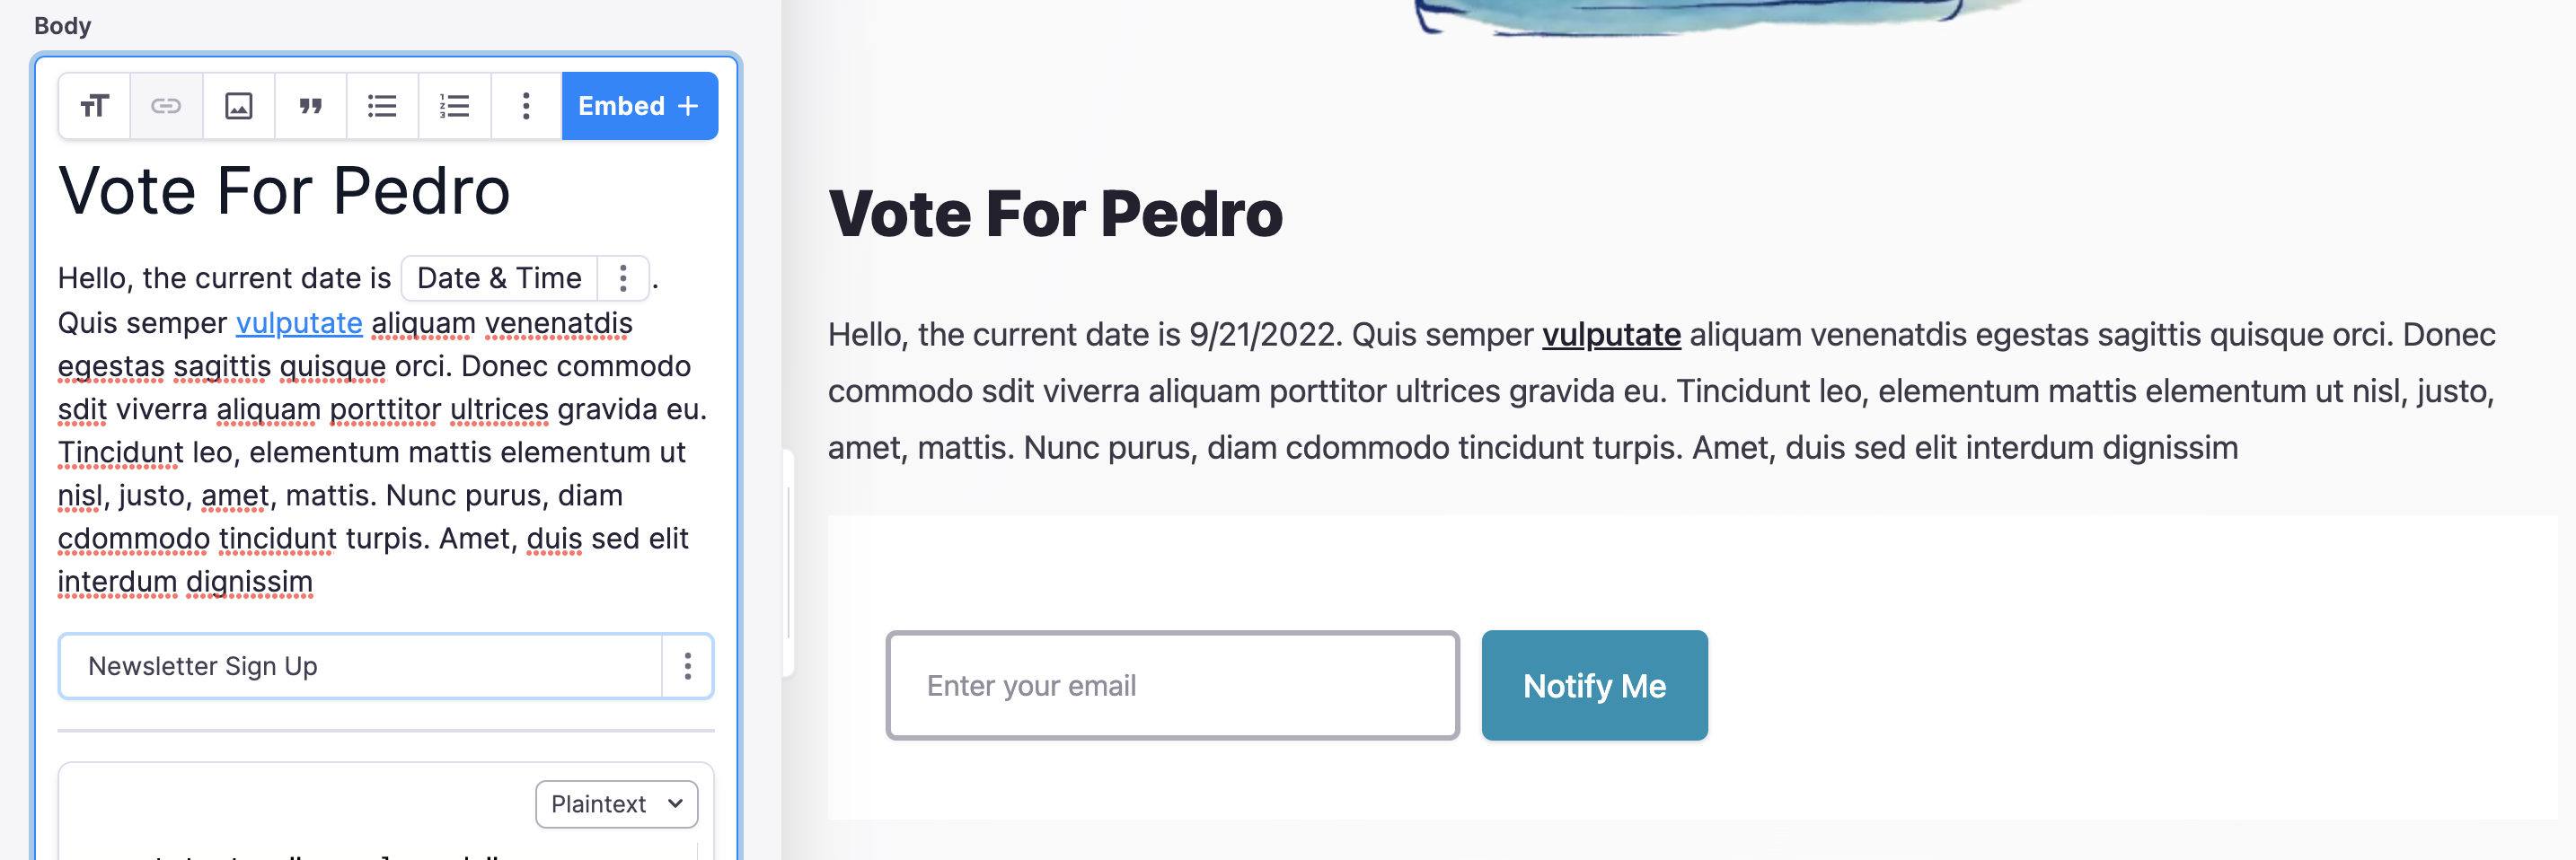
Rich-text templates
This only works for documents of the mdx format.
Tina also needs to have each MDX component defined in advance, when you define your collection.
By defining the above NewsletterSignup template, our editors now have the ability to add that template to the page body.
{label: 'Blog Posts',name: 'post',path: 'content/posts',- format: 'md',+ format: 'mdx',fields: [{type: 'rich-text',label: 'Post Body',name: 'body',isBody: true,+ templates: [+ {+ name: "newsletterSignup",+ label: "Newsletter Sign Up",+ fields: [+ {+ name: "children",+ label: "CTA",+ type: "rich-text",+ },+ {+ name: "buttonText",+ label: "Button Text",+ type: "string",+ }+ ],+ },+ ],},],},
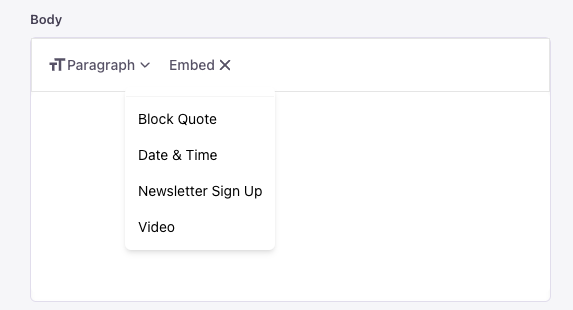
The rich-text field also gets a new 'embed' option for adding in these components.
Linking to React components
Once you've registered a template with a rich-text field in a collection, Tina still needs to know how to render the custom component. Add the key and component to the mapping you pass into the components prop on <TinaMarkdown>.
The key should match the templates name property.
const components = {newsletterSignup: (props) => {return (<><div><TinaMarkdown content={props.children} /></div><div><form><input name="email-address" type="email" required /><button type="submit">{props.buttonText}</button></form></div></>)},};<TinaMarkdowncontent={body}components={components}/>
Once our custom component has been registered with TinaMarkdown, editors can easily add components, and immediately see them rendered on the page.