Separate Content Repo
Introduction
TinaCloud lets you split a single project across two GitHub repositories: a generator repo that holds your Tina schema and your application code, and a content repo that holds your editorial files (markdown / MDX content and media). Both repos belong to the same TinaCloud project; you don't create two projects and link them.
Video: TinaCloud - Supporting Growth with Separate Content Repository Setups (4 min)
Throughout this guide:
- Generator repo - your
tina/config.tsx, your Next.js / Astro / Remix / etc. app code, and the generated artifacts undertina/__generated__/. - Content repo - your
.md/.mdxfiles and media. No Tina configuration lives here.
Why?
A few reasons you might want this split:
- Decouple commit history. Editors commit dozens of small content edits a day; engineers commit once or twice. Keeping them in different repos keeps each repo's history readable.
- Permissions hygiene. Editors get write access to the content repo without ever touching application code.
- Multi-site reuse. A single content repo can power more than one generator (regional sites, partner-facing variants, docs + marketing).
Requirements
- A TinaCloud account.
- Two GitHub repositories you control, one for the generator, one for the content.
- The TinaCloud GitHub App installed on both repos' organisations (these may differ).
How it works
After setup, your TinaCloud project is bound to both repos. From the editor's point of view nothing about the dashboard changes; they edit, save, and submit for review the same way they always have. Behind the scenes:
- Schema is loaded from the generator repo's indexed schema. It is never read from the content repo.
- Editorial branches and pull requests created via Tina's editorial workflow are made on the content repo.
- Media uploads go to the content repo.
- Search index rebuilds on every content-repo push.
- The CLI reads content from a sibling content directory via
localContentPathduring local development and CI builds.
Set up a new TinaCloud project
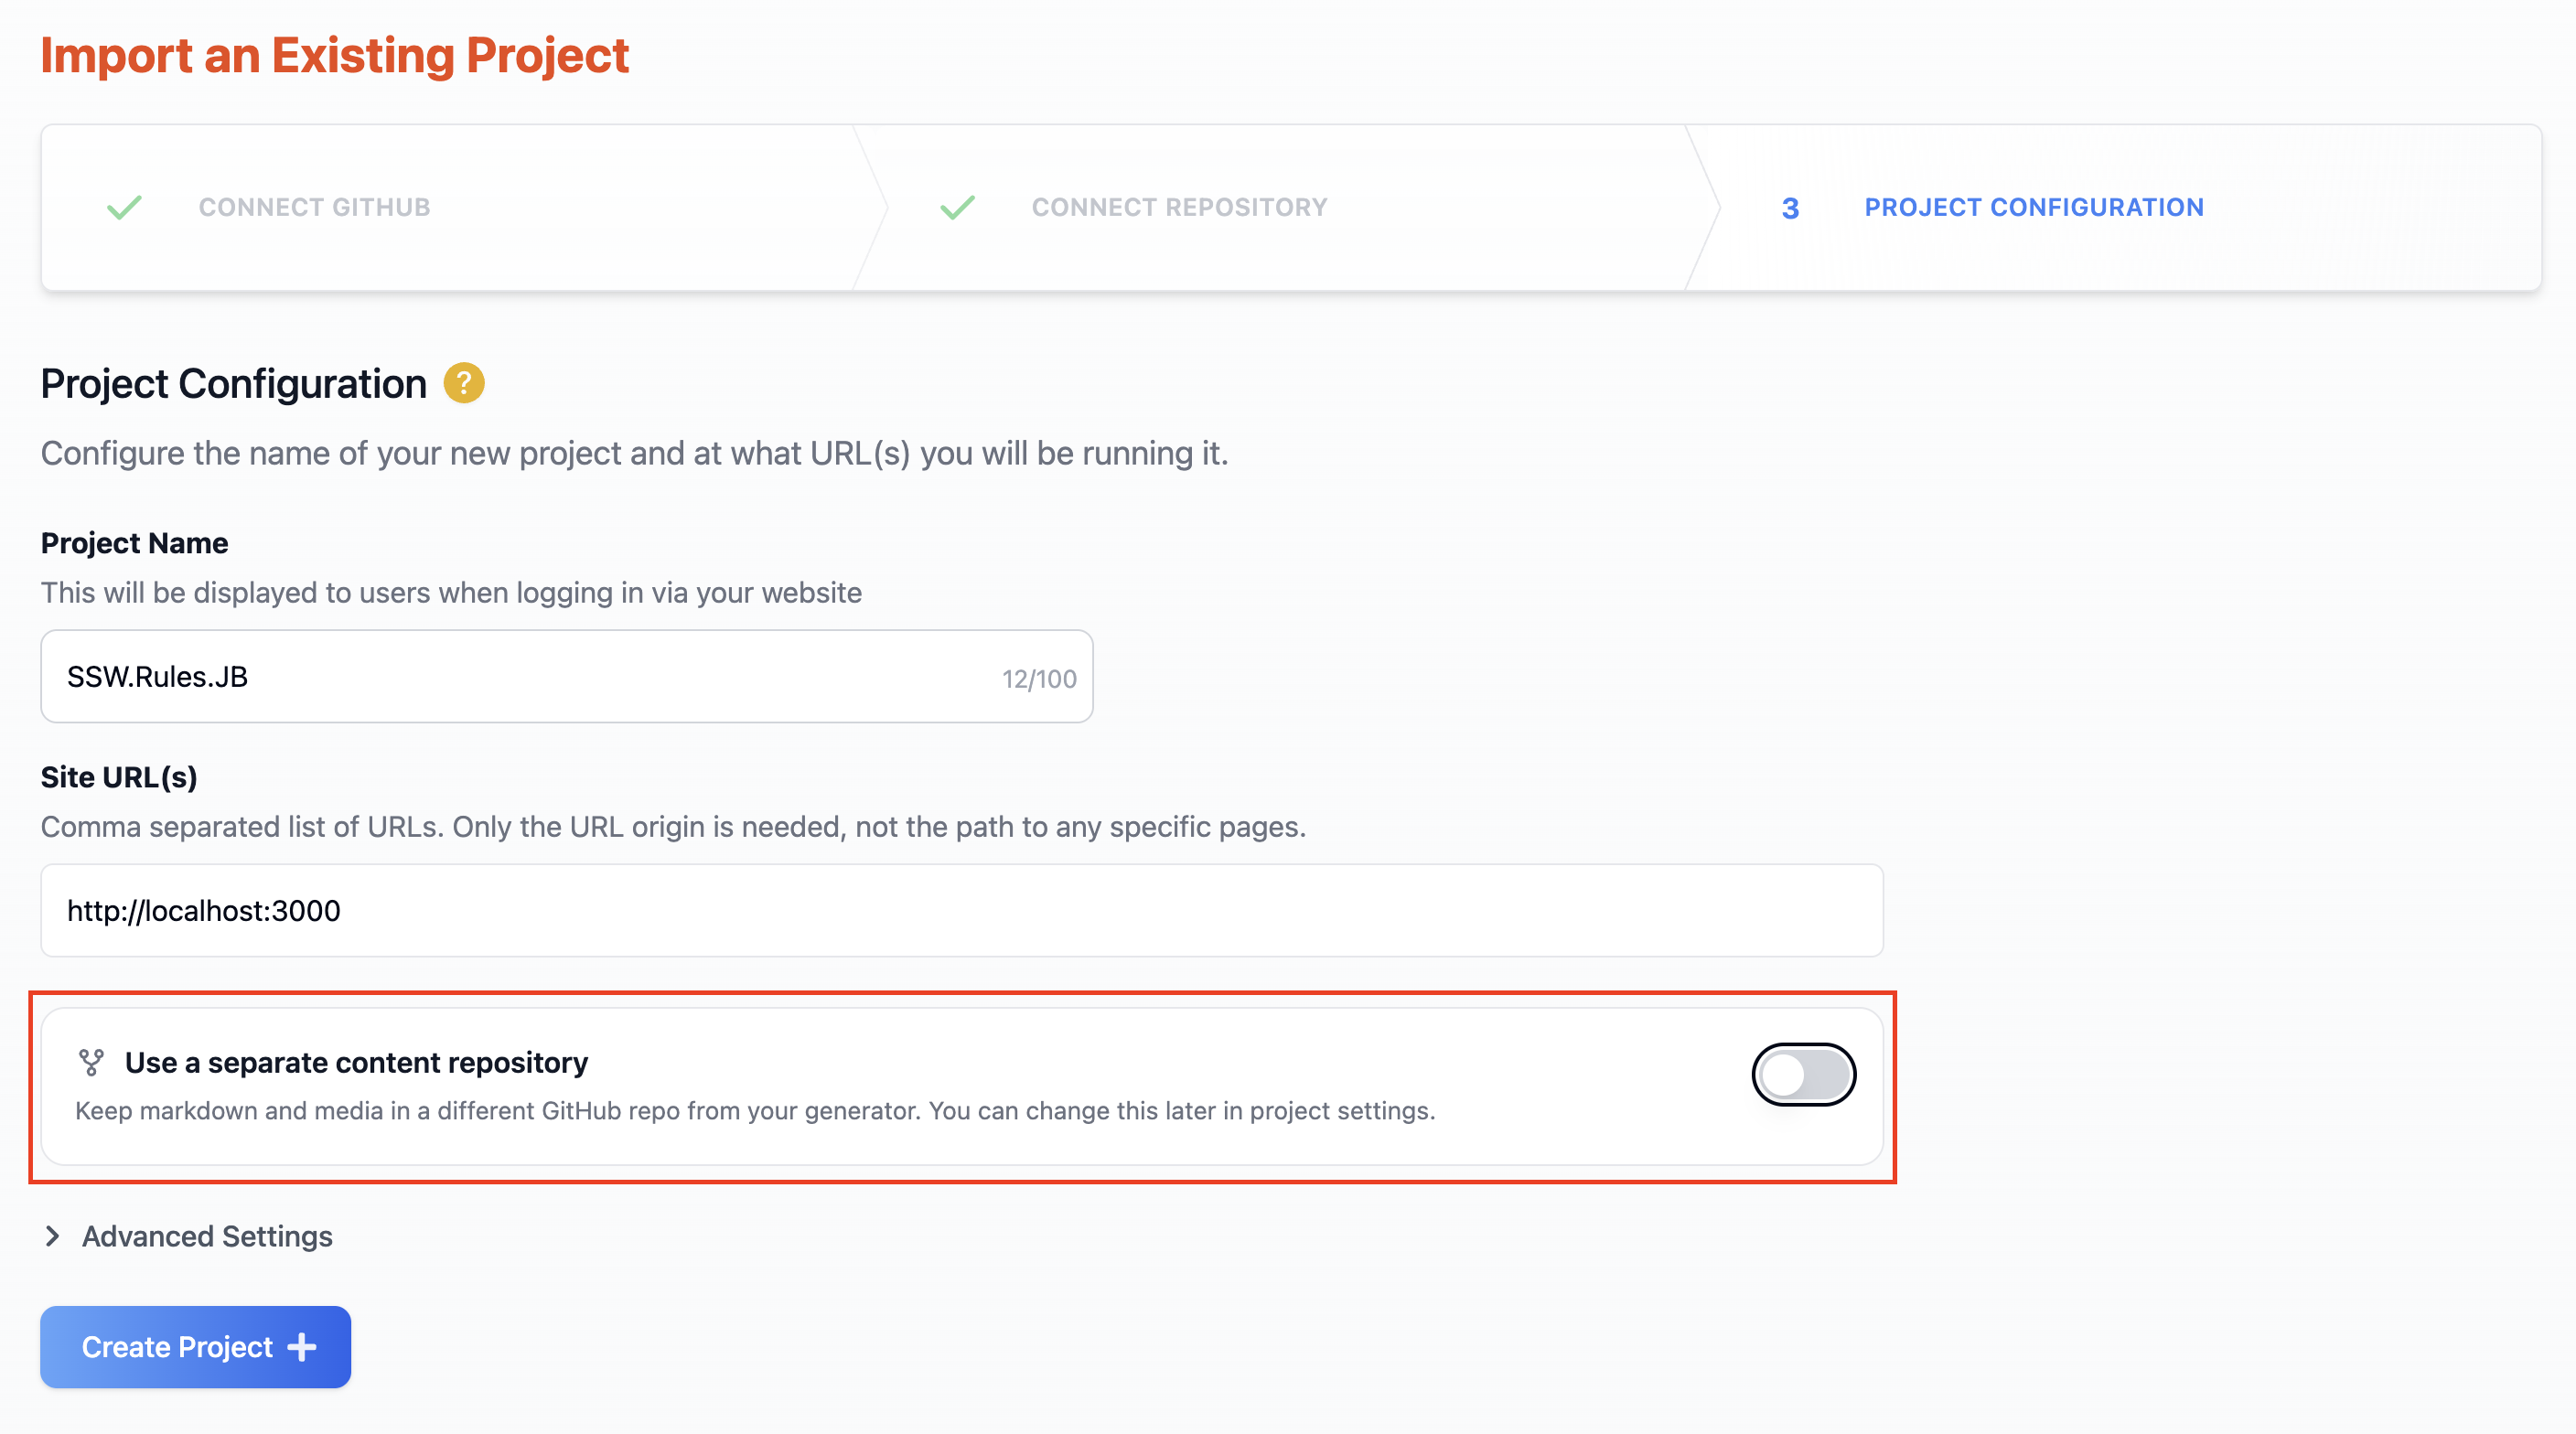
The TinaCloud dashboard surfaces the multi-repo option directly in the create-project flow.
- From the TinaCloud dashboard, click Create Project.
- Pick your generator repo as you would for any project.
- Project Configuration | Toggle on Use a separate content repository.
- Pick the content repo from the list. (If your content repo lives in a different GitHub organisation, install the TinaCloud GitHub App there first; the picker will only list repos the app has access to.)
- Click create.
TinaCloud automatically installs the necessary GitHub webhook on both repos.
The content repo does not need to contain atina/folder. The dashboard will index it from scratch.
Set up an existing TinaCloud project
If you already have a single-repo TinaCloud project and want to convert it to multi-repo:
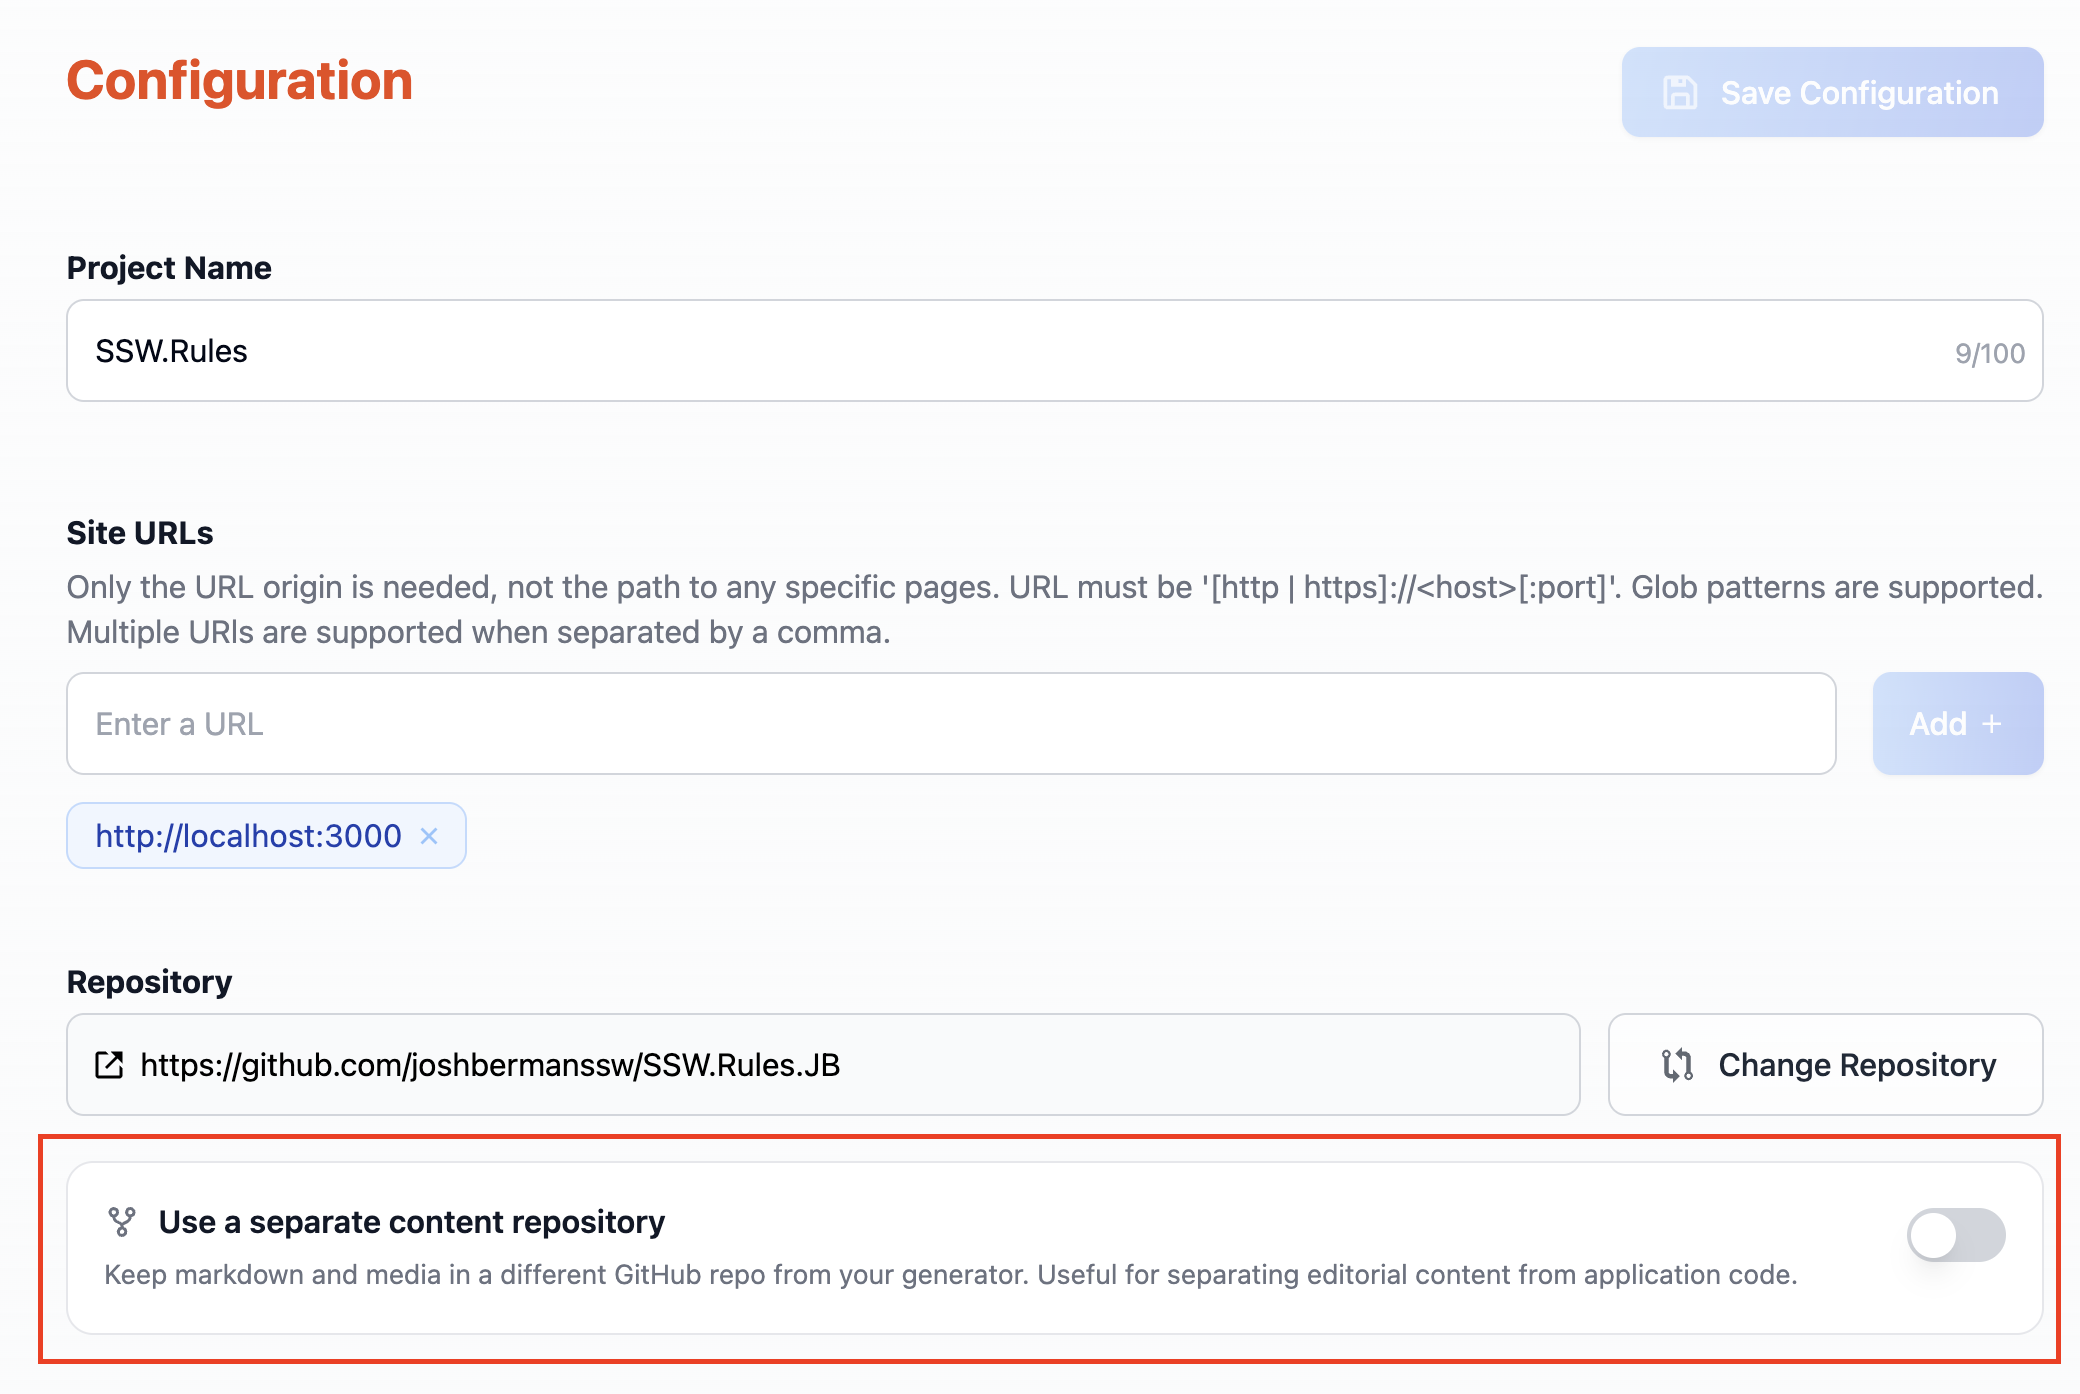
- Open your project's Configuration page.
- Find the Content Repository section.
- Toggle on Use a separate content repository.
- Pick the content repo.
- Confirm.
TinaCloud will index the content repo's default branch from scratch and re-route subsequent editorial workflow operations to it. You can flip the toggle off later to revert to single-repo, though the content repo's editorial branches will remain on the content repo until cleaned up manually.
Configure your generator repo
In your generator repo's tina/config.tsx, add localContentPath so the CLI can find your content files during local development and CI builds:
import { defineConfig } from 'tinacms';export default defineConfig({// ...your existing configlocalContentPath: '../my-content-repo',});
The path is resolved relative to the tina/ folder. The most common layout is siblings under a shared parent directory, both repos cloned into the same folder.
localContentPath is local-dev only. The TinaCloud production runtime reads content from the content repo via GitHub regardless of this setting; the field is consumed by tinacms dev and tinacms build so the CLI can locate content files when they aren't checked out next to the generator code.
Local development
Check both repos out as siblings on disk:
parent/├── my-generator-repo/│ └── tina/│ └── config.tsx└── my-content-repo/└── content/└── posts/└── hello.mdx
From the generator repo, run your usual dev command:
pnpm dev # or npm run dev / yarn dev
Tina's dev server will watch the content repo's files alongside the generator's schema. Editing a content file in my-content-repo/content/posts/hello.mdx will hot-reload the admin UI; editing my-generator-repo/tina/config.tsx will regenerate the schema. Generated artifacts only ever land in my-generator-repo/tina/__generated__/.
What lives where
Item | Generator repo | Content repo |
|---|---|---|
| ✅ | ❌ |
| ✅ | ❌ |
| ✅ | ❌ |
Application code (Next.js / Astro / etc.) | ✅ | ❌ |
| ❌ | ✅ |
Media (images, video, etc.) | ❌ | ✅ |
Editorial branches / PRs from the Tina UI | ❌ | ✅ |
Migrating from the old "two TinaCloud projects" pattern
Previous versions of this guide had you create two separate TinaCloud projects and connect them via a tina/meta.json file with an upstreamClientId. That pattern is no longer the recommended setup; a single TinaCloud project with two repo bindings replaces it.
If you have an existing setup following the old pattern, migrate as follows:
- Pick the project that points at your generator repo. This is the project you will keep.
- Open that project's settings, toggle on Use a separate content repository, and pick the same content repo you've been using.
- Update your
.envin the generator repo soNEXT_PUBLIC_TINA_CLIENT_IDandTINA_TOKENreference the generator project's credentials (you may already be doing this). - Delete the content repo's TinaCloud project; it is no longer used.
- Optional clean-up: delete the
tina/meta.jsonfile from the content repo; nothing reads it any more. You can also delete thetina/__generated__/folder from the content repo if your previous setup committed it there; these artifacts now only live in the generator.
Path Configuration Considerations
When defining collection paths inside your tina/config.(ts/js), avoid setting path: ''. Tina expects a folder-relative path; an empty string can result in errors when creating new documents because Tina prepends a / when saving, which can produce invalid GitHub paths.
Static Site Generator Compatibility
If you are using a static site generator other than Next.js (such as Astro), ensure your content pipeline ignores the tina/ directory inside your generator repo; Tina's config and generated files are not content files and may cause parsing errors when picked up by content collections.
export default defineCollection({schema: mySchema,exclude: ['tina/**/*'],});
If you previously set up multi-repo before the latest tinacms version, your content repo may also have a stale tina/ folder left over from when generated artifacts were written there. It is safe to delete; nothing reads it any more.
Triggering Website Builds from the Content Repo (Optional)
When using a separate content repo, you may want content updates (e.g. from the Tina UI) to automatically trigger a build of your website. TinaCloud supports this out of the box using webhooks.
Using TinaCloud Webhooks (Recommended)
TinaCloud can be configured to send a POST request to a webhook endpoint whenever content changes are committed. This is the recommended way to trigger a rebuild of your website.
👉 Check out the webhook functionality for more details.
Triggering Builds with GitHub Actions
As an alternative to using webhooks, you can trigger website builds with GitHub Actions. This is useful if your platform doesn't support build webhooks, or if you want more control over the build process.
Example Workflow
Create a workflow file in your content repo (e.g. .github/workflows/trigger-website-build.yml):
name: Trigger Website Buildon:workflow_dispatch:push:branches:- '**'jobs:trigger-deploy:runs-on: ubuntu-latestif: github.repository_owner == 'your-org'steps:- name: Generate a tokenid: generate-tokenuses: actions/create-github-app-token@v2with:app-id: ${{ vars.MY_APP_ID }}private-key: ${{ secrets.MY_APP_PRIVATE_KEY }}owner: your-orgrepositories: your-website-repo- name: Trigger website deployrun: |gh workflow run build-and-deploy.yml \--repo your-org/your-website-repo \--ref main \--field run_id="$GITHUB_RUN_ID" \--field branch_name="${GITHUB_REF#refs/heads/}"env:GH_TOKEN: ${{ steps.generate-token.outputs.token }}
Prerequisites
This setup requires:
- A GitHub App with access to both repos.
- Token and app secrets saved in GitHub repo settings.
Troubleshooting
- "GitHub App not installed on this repository's organisation" when picking a content repo. The TinaCloud GitHub App must be installed on the organisation (or user account) that owns the repo. If your generator and content repos live under different GitHub orgs, install the app on each separately.
- The content repo's picker is missing repos you expect to see. GitHub Apps grant per-repo access. Open the GitHub App's settings on the relevant org and grant access to the specific repo you want to use, then refresh the dashboard.
- Stale
tina/folder in the content repo after upgrading. Pre-upgrade builds committedtina/__generated__/*andtina/tina-lock.jsonto the content repo. Nothing updates or reads those files in the new model. Safe, and recommended, to delete from the content repo in a single cleanup commit. - Old
tina/meta.jsonfile in the content repo. This was the connector for the old two-projects pattern. No longer used; delete it. - Content edits aren't appearing in builds. Confirm the generator repo's
tina/config.tsxhaslocalContentPathset, and that you have the content repo checked out as a sibling on disk.