v.Latest
Documentation
渲染Markdown内容
Loading last updated info...
在此页面上
当通过Tina的API请求你的Markdown内容时,Tina会提供一个*解析后的AST(抽象语法树)*版本的内容。
解析后的AST使开发者能够逐步遍历每个节点,并完全控制地渲染它。
下面的例子展示了一些示例Markdown及其相关的AST。
This is how TinaCMS turns your markdown into structured data!Here is an image: 
{"type": "root","children": [{"type": "p","children": [{"type": "text","text": "This is how TinaCMS turns your markdown into structured data!"}]},{"type": "p","children": [{"type": "text","text": "Here is an image: "},{"type": "img","url": "/github-mark.svg",}]},]}
内置Markdown渲染
Tina还提供了一个<TinaMarkdown>组件,它可以从解析后的AST渲染你的md或mdx组件,而无需自己处理数据结构。
只需通过content属性传入Markdown内容即可。
import { TinaMarkdown } from "tinacms/dist/rich-text";const MyMarkdownBlog = (props) => {return (<><h1>{props.data.title}</h1><TinaMarkdown content={props.data.body} /></>)}
样式化Markdown元素
<TinaMarkdown>组件接受一个components字段,该字段将HTML元素属性映射到React组件。
当一个元素出现在AST树中时,它将被拦截并替换为映射中的React组件。
const components = {h1: (props) => (<h1 style={{ color: 'blue' }}>{props.children}</h1>),p: (props) => (<p style={{ fontSize: '18px' }}>{props.children}</p>),};<TinaMarkdowncontent={body}components={components}/>
MDX和自定义元素
如果你使用mdx作为格式,你将能够定义编辑者可以利用的自定义组件。
MDX如何与Tina一起工作?
Tina不需要像其他MDX工具那样的编译步骤,所以它需要提前知道你支持的所有可能元素。
而不是在MDX中使用import语句,你需要在Tina的schema中将每个元素注册为一个template。
富文本模板
这仅适用于mdx格式的文档。
在定义集合时,Tina还需要提前定义每个MDX组件。
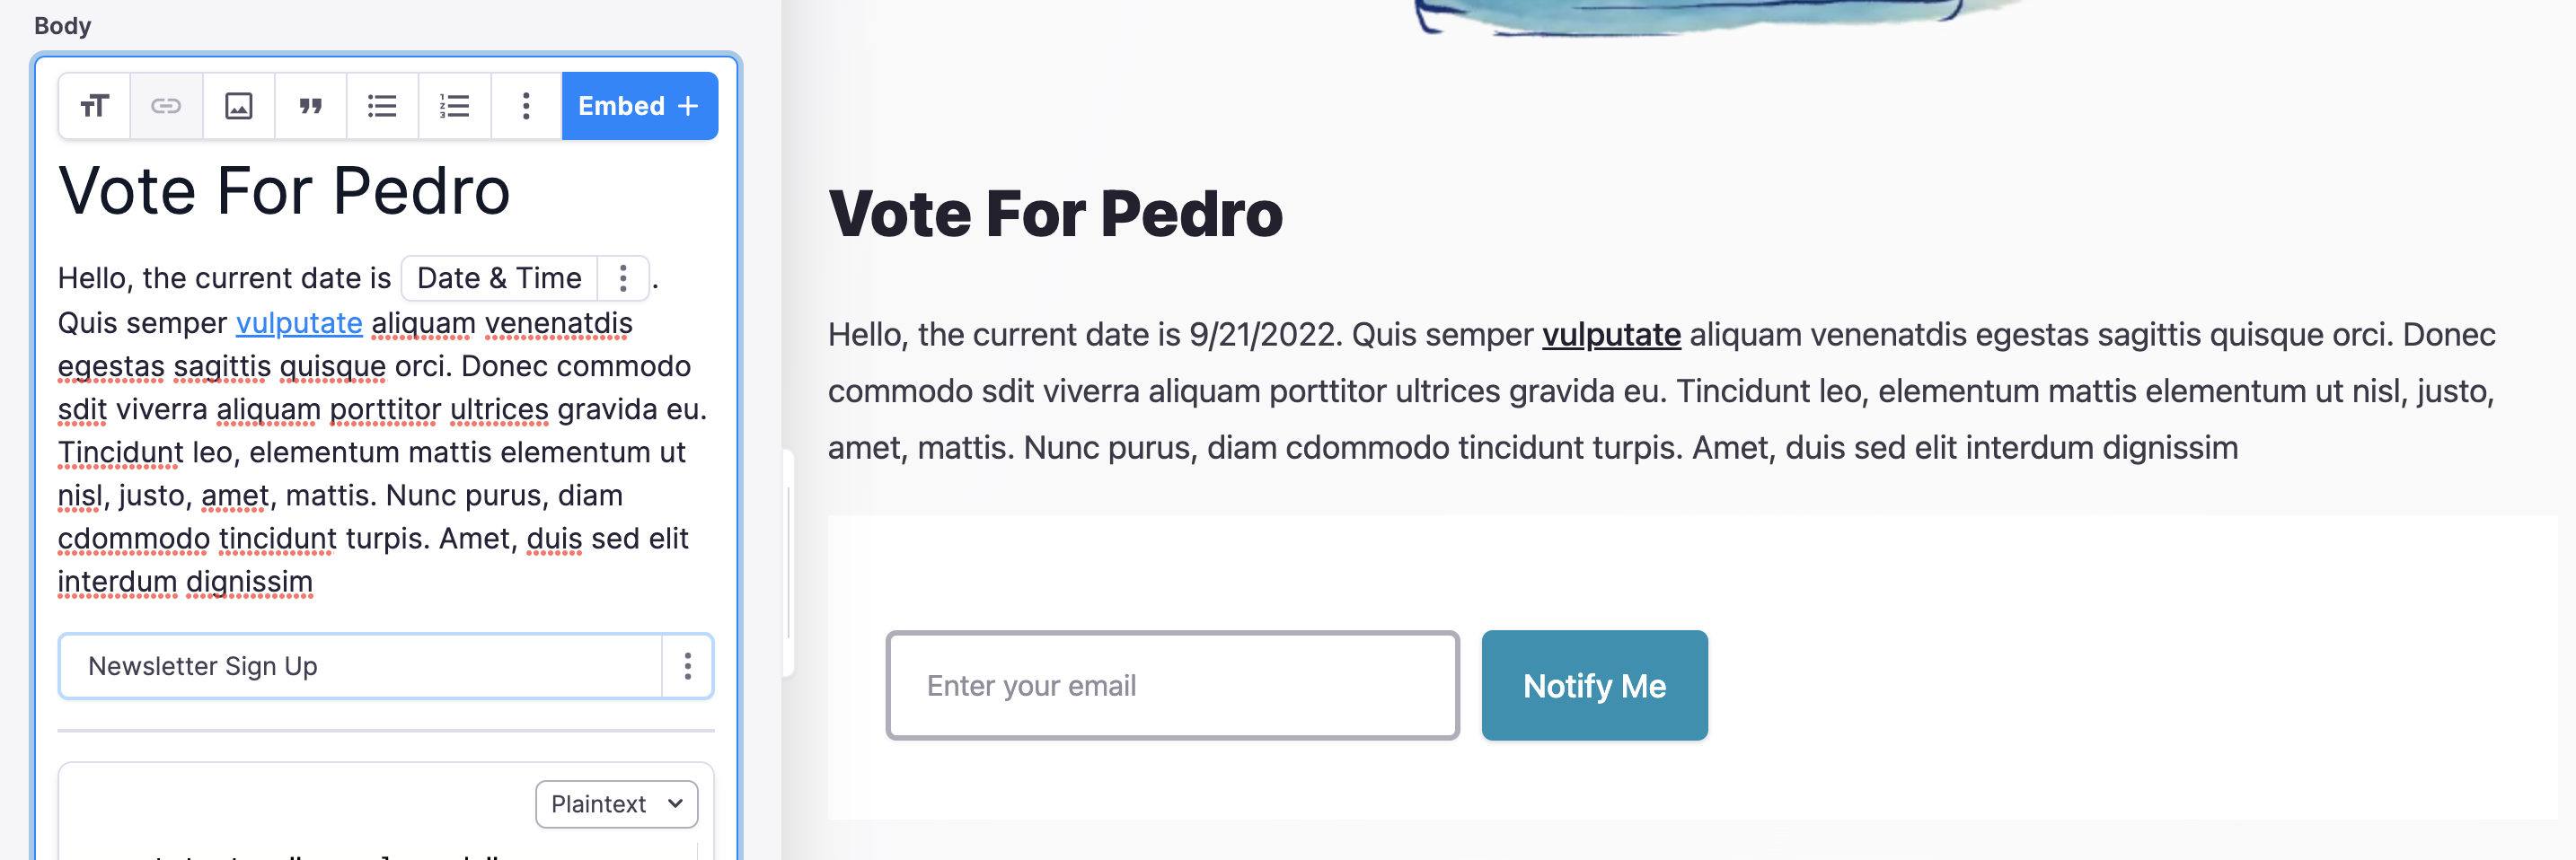
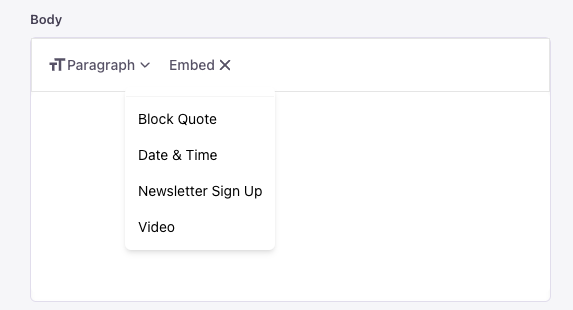
通过定义上述NewsletterSignup模板,我们的编辑者现在可以将该模板添加到页面主体中。
{label: '博客文章',name: 'post',path: 'content/posts',- format: 'md',+ format: 'mdx',fields: [{type: 'rich-text',label: '文章正文',name: 'body',isBody: true,+ templates: [+ {+ name: "newsletterSignup",+ label: "新闻订阅注册",+ fields: [+ {+ name: "children",+ label: "CTA",+ type: "rich-text",+ },+ {+ name: "buttonText",+ label: "按钮文本",+ type: "string",+ }+ ],+ },+ ],},],},
富文本字段还获得了一个新的“嵌入”选项,用于添加这些组件。
链接到React组件
一旦你在集合中用富文本字段注册了一个template,Tina仍然需要知道如何渲染自定义组件。将键和值添加到传递给<TinaMarkdown>的components属性的映射中。
键应与模板的name属性匹配。
const components = {newsletterSignup: (props) => {return (<><div><TinaMarkdown content={props.children} /></div><div><form><input name="email-address" type="email" required /><button type="submit">{props.buttonText}</button></form></div></>)},};<TinaMarkdowncontent={body}components={components}/>
一旦我们的自定义组件已在TinaMarkdown中注册,编辑者可以轻松添加组件,并立即在页面上看到它们的渲染效果。