How to Use Syntax Highlighting with TinaMarkdown
👋 Hello and welcome. Today we are going to walk you through how to use syntax highlighting with TinaMarkdown. Through a very basic setup and example we will walk you through adding syntax highlighting so that your editors will love you (or at least highly appreciate you).
Prefer to learn through videos? Check out our video covering syntax highlighting:
Setup
The starting point that I have created for this tutorial contains a very basic implementation of Tina that includes a blog. It is using our rich-text editor and our TinaMarkdown component.
# clone the repositorygit clone https://github.com/tinacms/examples.git tina-examplescd tina-examples# Starting commitgit checkout 7753363ad1e967524359131565f13791d3a378eb# move into the directorycd syntax-highlighting# install the dependenciesyarn# launch Tina + Next.jsyarn dev
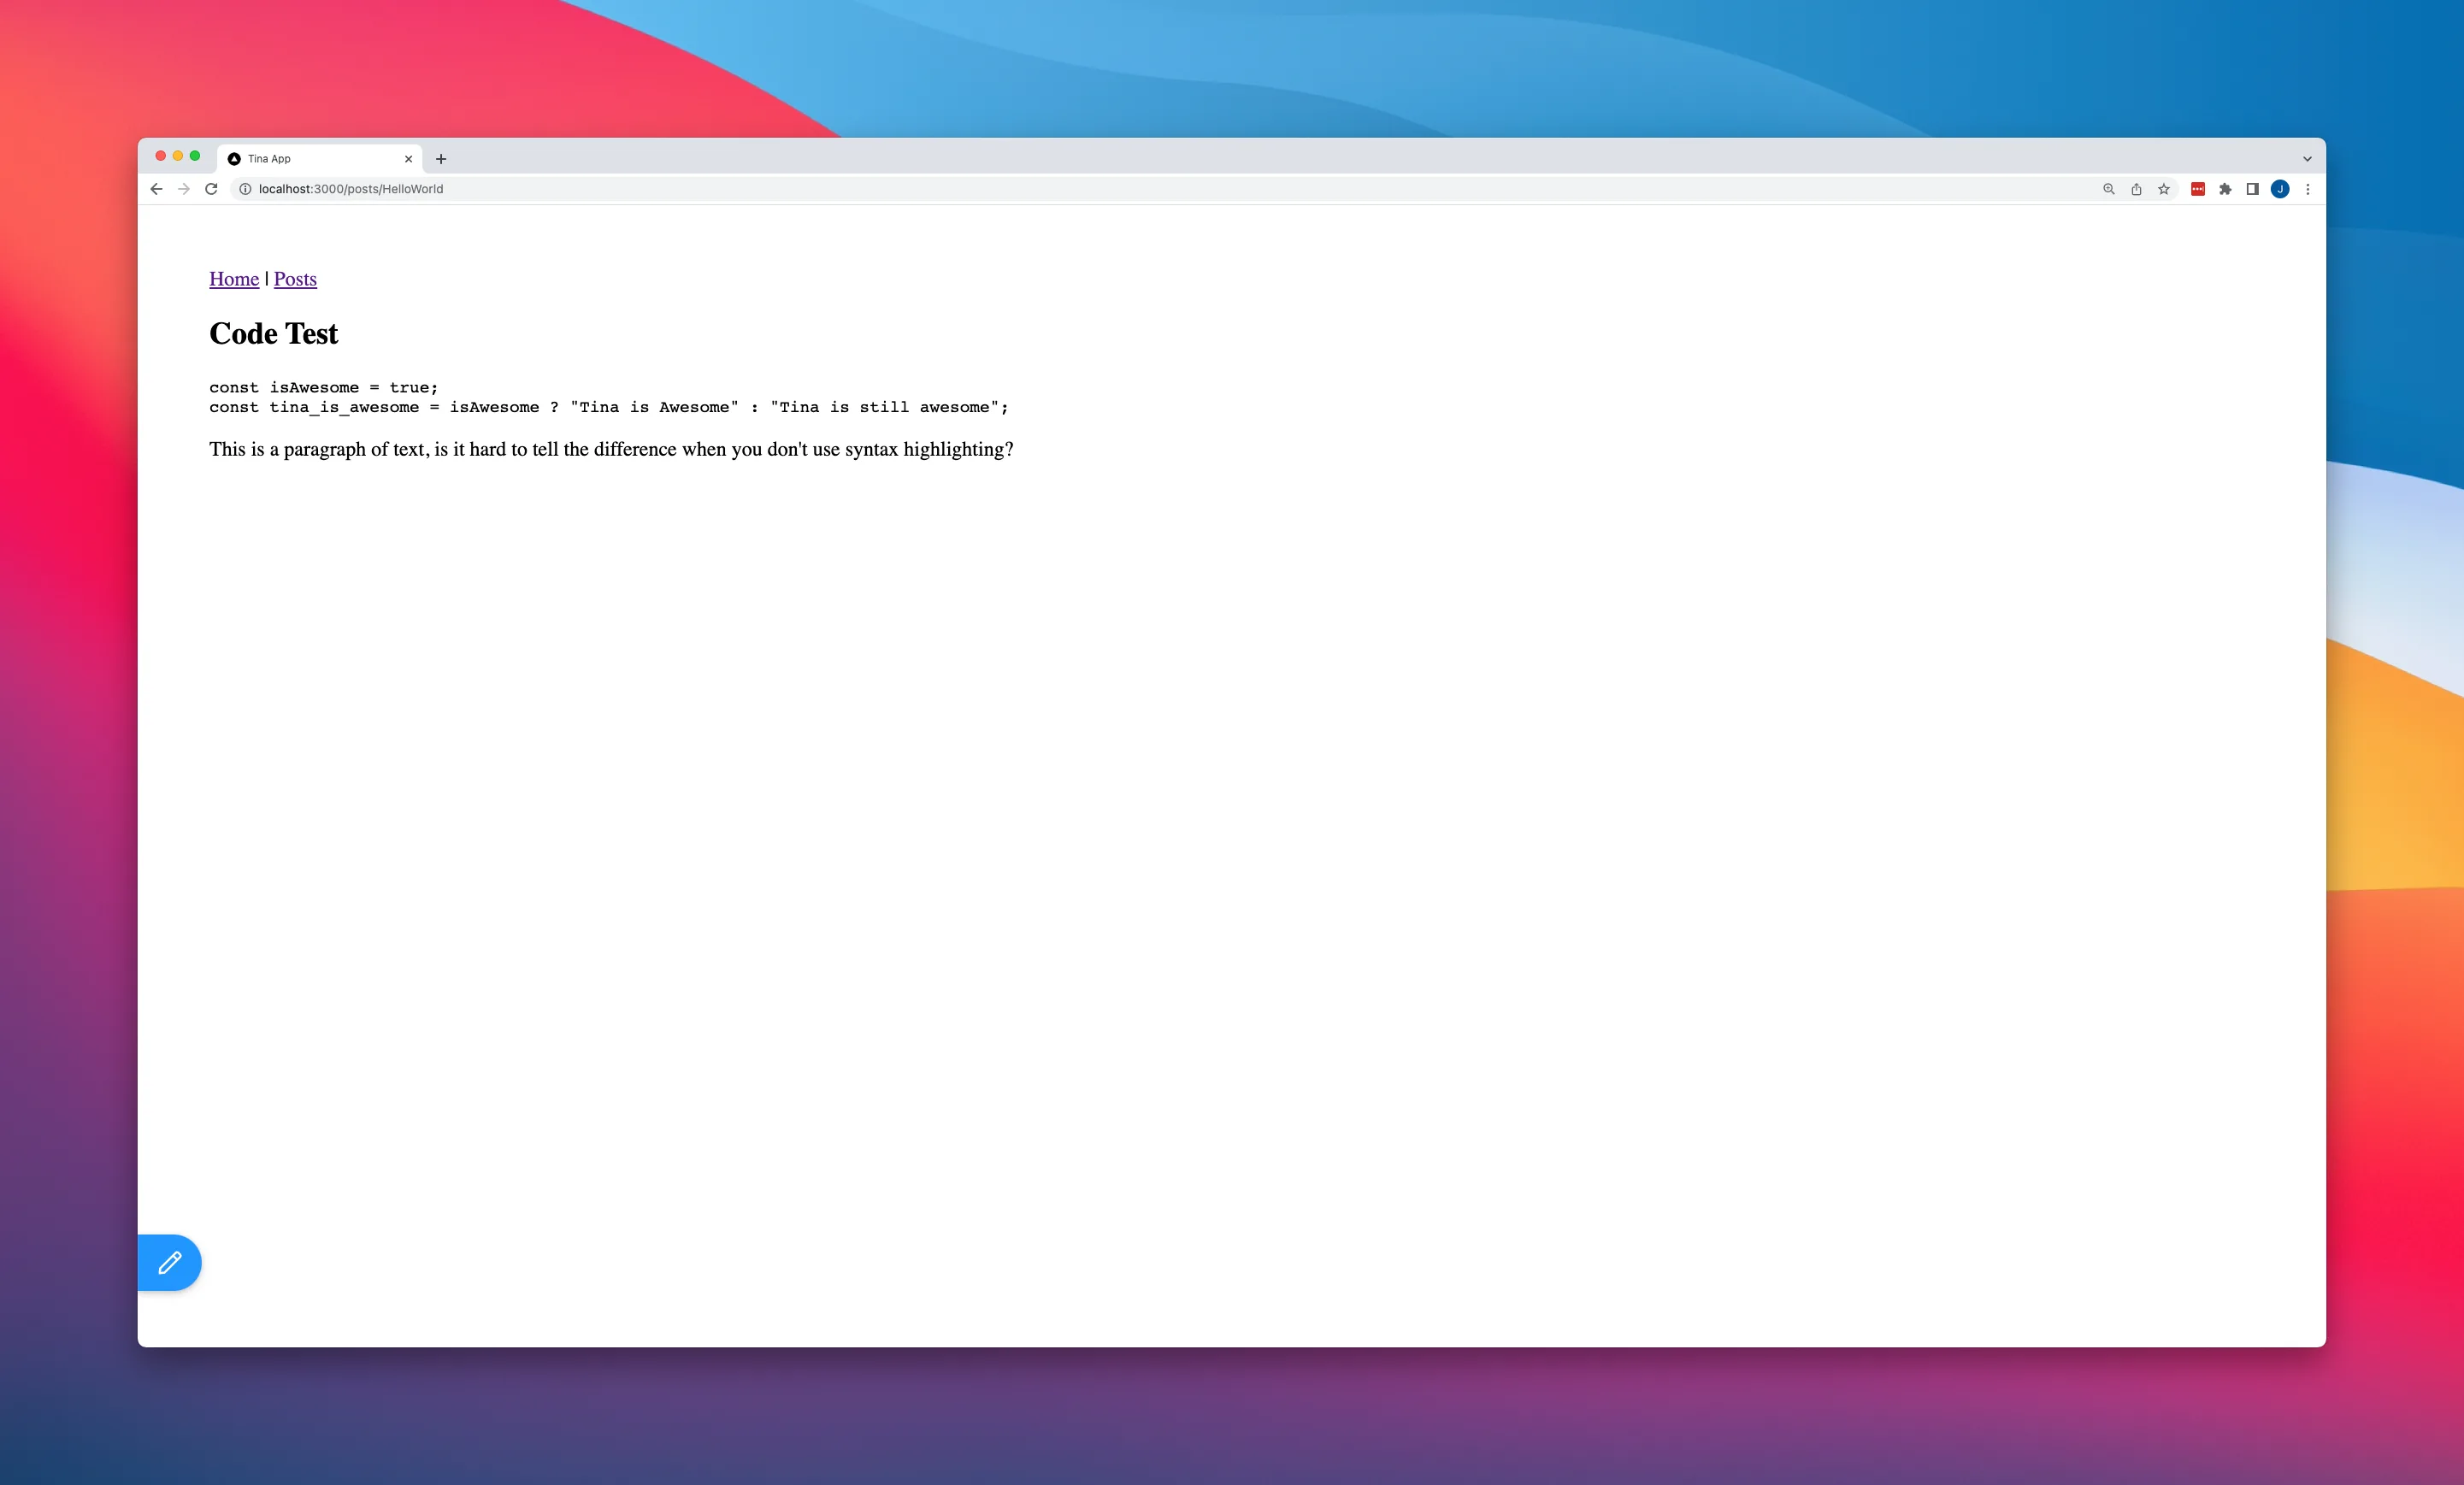
Once our Next.js application is running, you can navigate to http://localhost:3000/post/HelloWorld. From there you will see a blog post that has a code block that looks a lot like regular text. When this is within a paragraph it may be hard for you or your editors to tell the difference between the code and regular text. Adding syntax highlighting will easily fix that!
Adding syntax highlighting
Installing our package
For this tutorial we are going to use react-syntax-highlighter. If you prefer a different package, once you make your way through this tutorial and understand how it all works, you can use your favorite package and it will work the same.
# Install the syntax highlighting packageyarn add react-syntax-highlighter
Now we have our syntax highlighter installed, we can create a component that we can pass our props to.
Creating our component
First, we need to create a new filed called Codeblock.js inside the components folder.
# create the file in the components directorytouch ./components/Codeblock.js
Need to compare your code click here for the commit
Inside of our newly created Codeblock.js file, we need to import a theme and Prism. I am going to use my favorite theme atomOneDark but your favorites will work just as well as mine
import { Prism as SyntaxHighlighter } from 'react-syntax-highlighter';import atomOneDark from 'react-syntax-highlighter/dist/cjs/styles/prism/material-dark';
The component we are creating is going to take on two props: children and language. The children props holds all of the code we type into a code block, the language will be the language selected when editing the content for example javascript .
const Codeblock = ({ children, language }) => {};
Now we have our component skeleton we can return our SyntaxHighlighter and pass in the children language .The SyntaxHighlighter is going to take on three different props code, language and style for example:
<SyntaxHighlightercode={YOUR_CODE}language={YOUR_LANGUAGE}style={YOUR_THEME}/>
So for our component we are going to pass the children to the code prop and language to the language prop and the atomOneDark to the style prop. It should now look like this:
const Codeblock = ({ children, language }) => {return (<SyntaxHighlightercode={children || ''}language={language || 'jsx'}style={atomOneDark}/>);};
You may notice that I included an or statement to the props we are passing in. This will make sure that when we create a new empty code block that Prism doesn’t error out
Finally, we need to export our component for use inside our [slug].js file. We can do this by adding export {Codeblock} at the bottom of our file. Our component file is now complete, and should look like this:
import { Prism as SyntaxHighlighter } from 'react-syntax-highlighter';import atomOneDark from 'react-syntax-highlighter/dist/cjs/styles/prism/material-dark';const Codeblock = ({ children, language }) => {return (<SyntaxHighlightercode={children || ''}language={language || 'jsx'}style={atomOneDark}/>);};export { Codeblock };
View the completed component in this commit

Using our component in our [slug].js
Now, we will import the component we just created into the [slug].js file.
import { Codeblock } from '../../components/Codeblock';
This gives us access to the component, and we can create a variable called components. This components variable can hold all of the different components we want our TinaMarkdown to use. In our example we are overriding an element versus creating a new component.
const components = {};
We are going to override the code_block element, if you are wondering what elements can be overridden you can find them all in our tinacms package.
Inside our component variable we can put a property named code_block which we can then use to override the original styling:
const components = {code_block:}
Now we are going to use the props that get passed from our TinaMarkdown and pass those along to our created component and return that
code_block: (props) => {return <Codeblock children={props.children} language={props.lang} />;};
Our components object is now complete and should look like this:
const components = {code_block: (props) => {return <Codeblock children={props.children} language={props.lang} />;},};
The final step is to use these components in our TinaMarkdown. To do that we are going to pass our components object to the components prop components={components} and our TinaMarkdown will look like the following:
<TinaMarkdown content={props.data.post.body} components={components} />
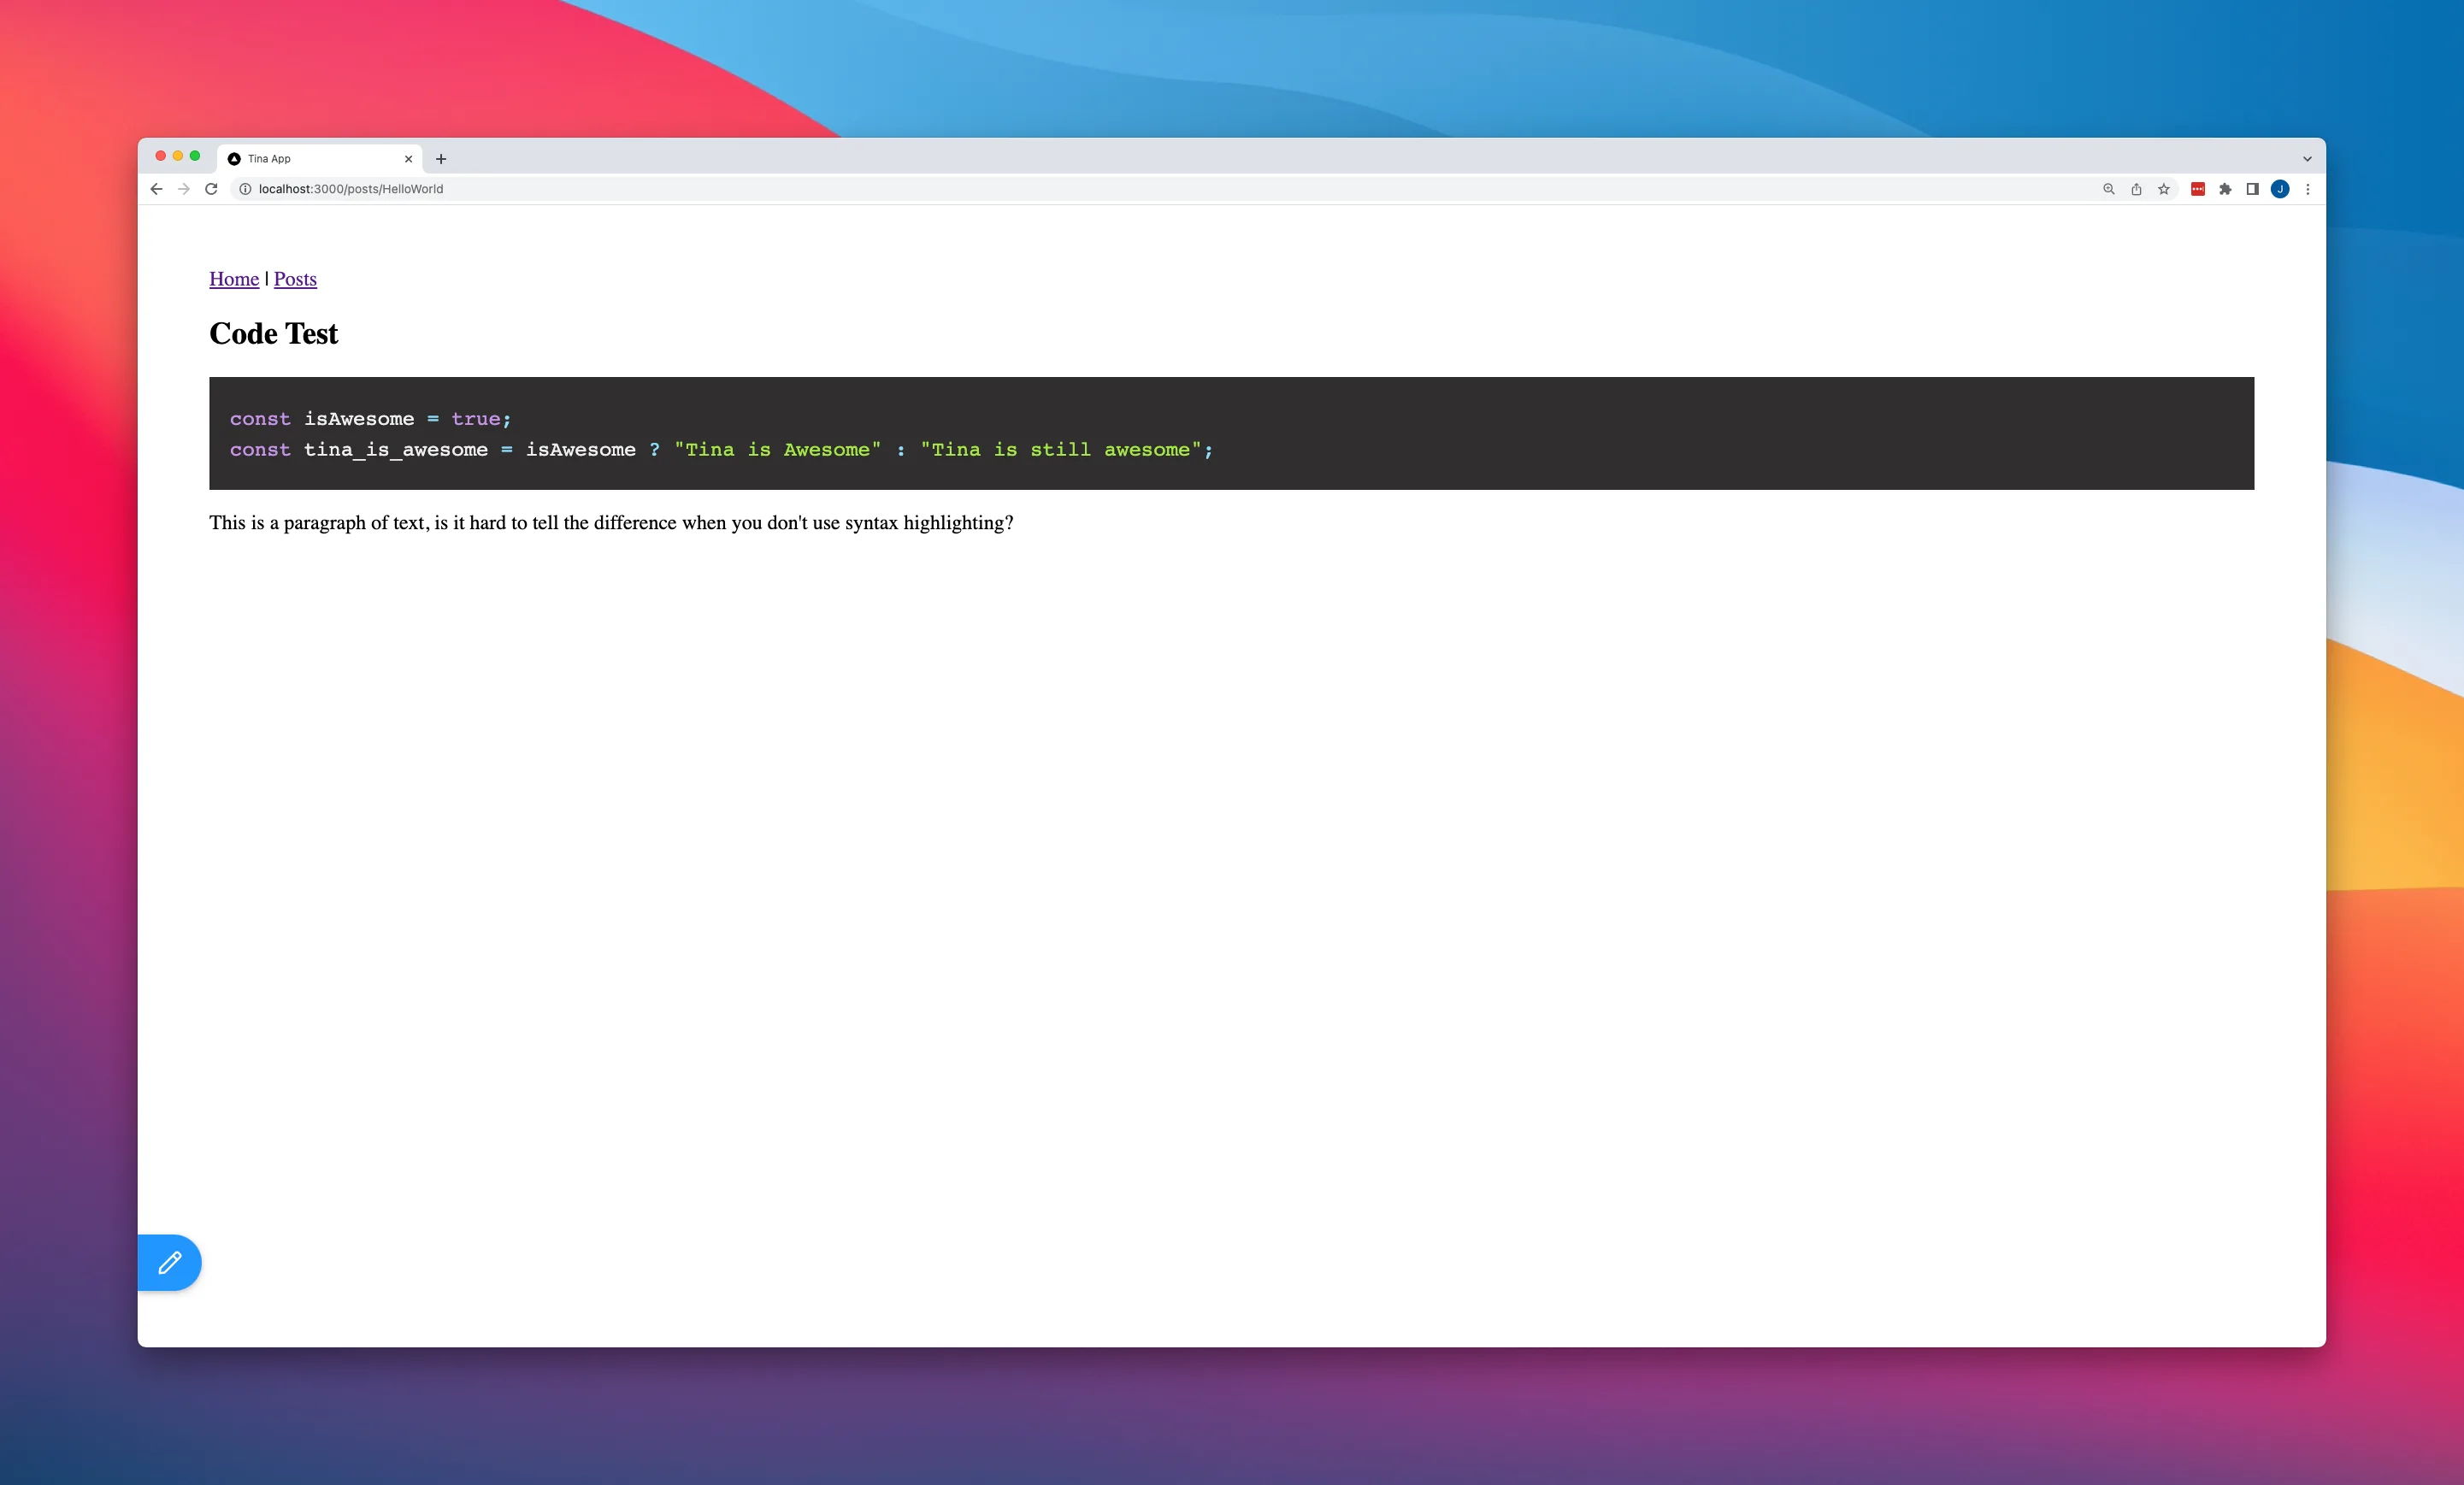
Now, you can launch using yarn dev and navigate back to http://localhost:3000/post/HelloWorld. You will see that our code block now has Prism syntax highlighting.
You can find the finished code in our GitHub examples repository
Where can you keep up to date with Tina?
You know that you will want to be part of this creative, innovative, supportive community of developers (and even some editors and designers) who are experimenting and implementing Tina daily.
Tina Community Discord
Tina has a community Discord that is full of Jamstack lovers and Tina enthusiasts. When you join you will find a place:
- To get help with issues
- Find the latest Tina news and sneak previews
- Share your project with Tina community, and talk about your experience
- Chat about the Jamstack
Tina Twitter
Our Twitter account (@tinacms) announces the latest features, improvements, and sneak peeks to Tina. We would also be psyched if you tagged us in projects you have built.