Plugins are a powerful concept. In general plugins are used to extend core functionality of a base system. While many plugin systems are static, TinaCMS is powered by a dynamic plugin system. In this approach, plugins are added and removed programmatically. This dynamism allows developers to add and remove CMS features based on the context.
If you’ve worked with Tina, you may have already used a few plugins without realizing it. The most common plugin used in tinacms is the FormPlugin which adds forms for editing content to the sidebar.
Another plugin worth noting is the ContentCreatorPlugin. This plugin provides the foundation for creating new data source files.
One of the more recent additions has been the ScreenPlugin, which is the topic of this blog. Screens allow you to render modal UI and handle various content editing needs. For example, one might use a Screen Plugin to register a form to edit 'global site data'.
What's that?
The ScreenPlugin has three main pieces: a name, an icon, and a React Component.
For example with a GlobalFormPlugin (a type of screen plugin), the name and the icon are used to list the screen plugin in the global menu.
When the user clicks on the menu item, it opens a screen in which the React Component is rendered. Think of a screen as an empty canvas, it provides the space to create an editing interface beyond the sidebar.
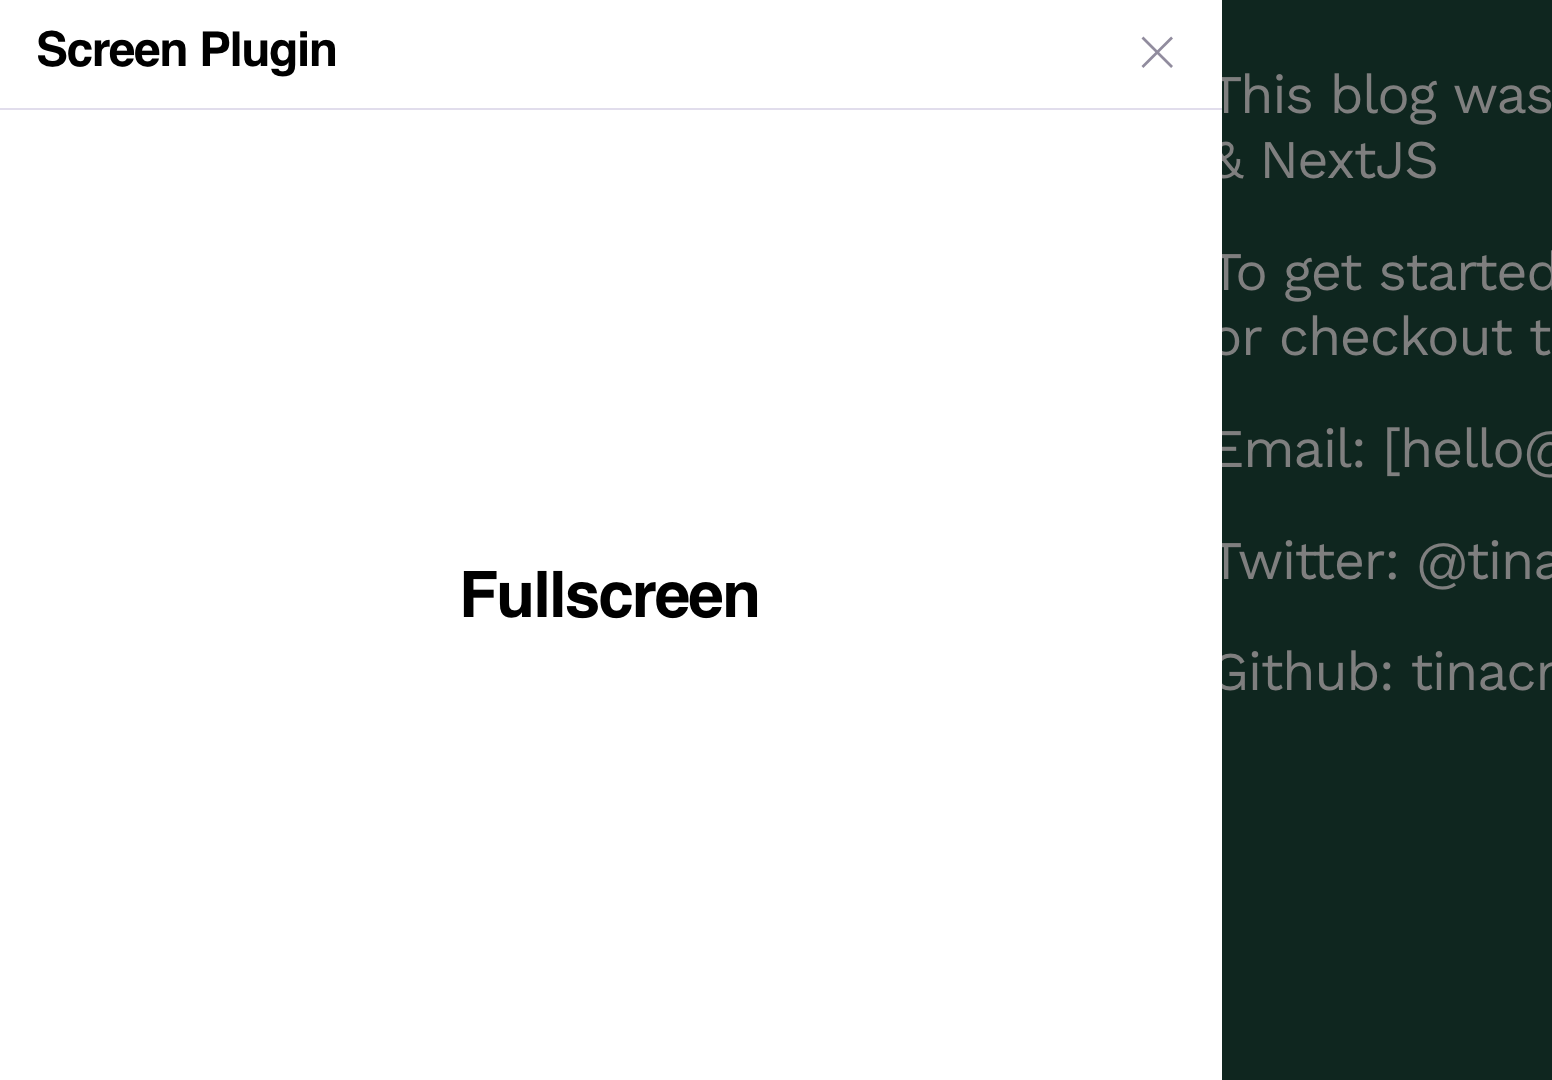
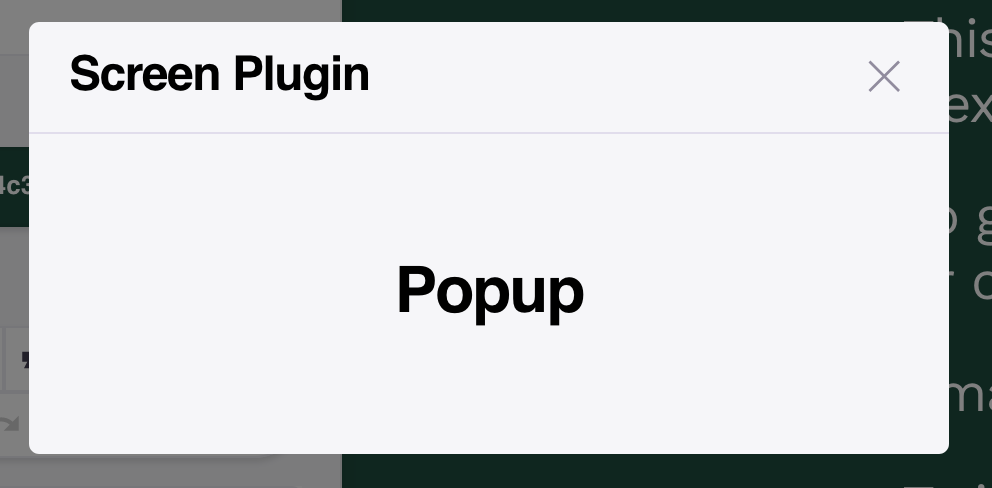
There are two potential layouts for a screen plugin: fullscreen and popup. You can choose to utilize either depending on the purpose of the screen.
Let's make a basic screen plugin!
To really get a feel for the way screen plugins work, let’s dive into setting one up.
Here's an example layout:
import { Quokka } from './cute-marsupials';export default function Island({ smiles }) {return <Quokka>{smiles}</Quokka>;}
Here we have an Island component that renders a smiling quokka.

The quokka, known as one of the happiest-looking animals on Earth, is a small marsupial native to Australia. These cheerful creatures are famous for their seemingly constant smiles and friendly demeanor.
Lately, a trend has developed to take jovial selfies with these critters.
Let's make a quokka selfie screen plugin for the tourists. We'll set this up in three steps:
- Import the
useScreenPluginhook fromtinacms - Create our
SelfiePlugin - Use that plugin in our App
// 1. Import `useScreenPlugin`import { useScreenPlugin } from 'tinacms';import { Quokka } from './cute-marsupials';// 2. Define the screen pluginconst SelfiePlugin = {name: 'Quokka Selfie',Icon: () => <span>🐨</span>,layout: 'popup',Component() {return <img src="/img/quokka-selfie.jpg" />;},};export default function Island({ smiles }) {// 3. Use the pluginuseScreenPlugin(SelfiePlugin);return <Quokka>{smiles}</Quokka>;}
For the icon, we inserted a little koala emoji (distant cousin of the quokka), but you replace that with an svg or png.
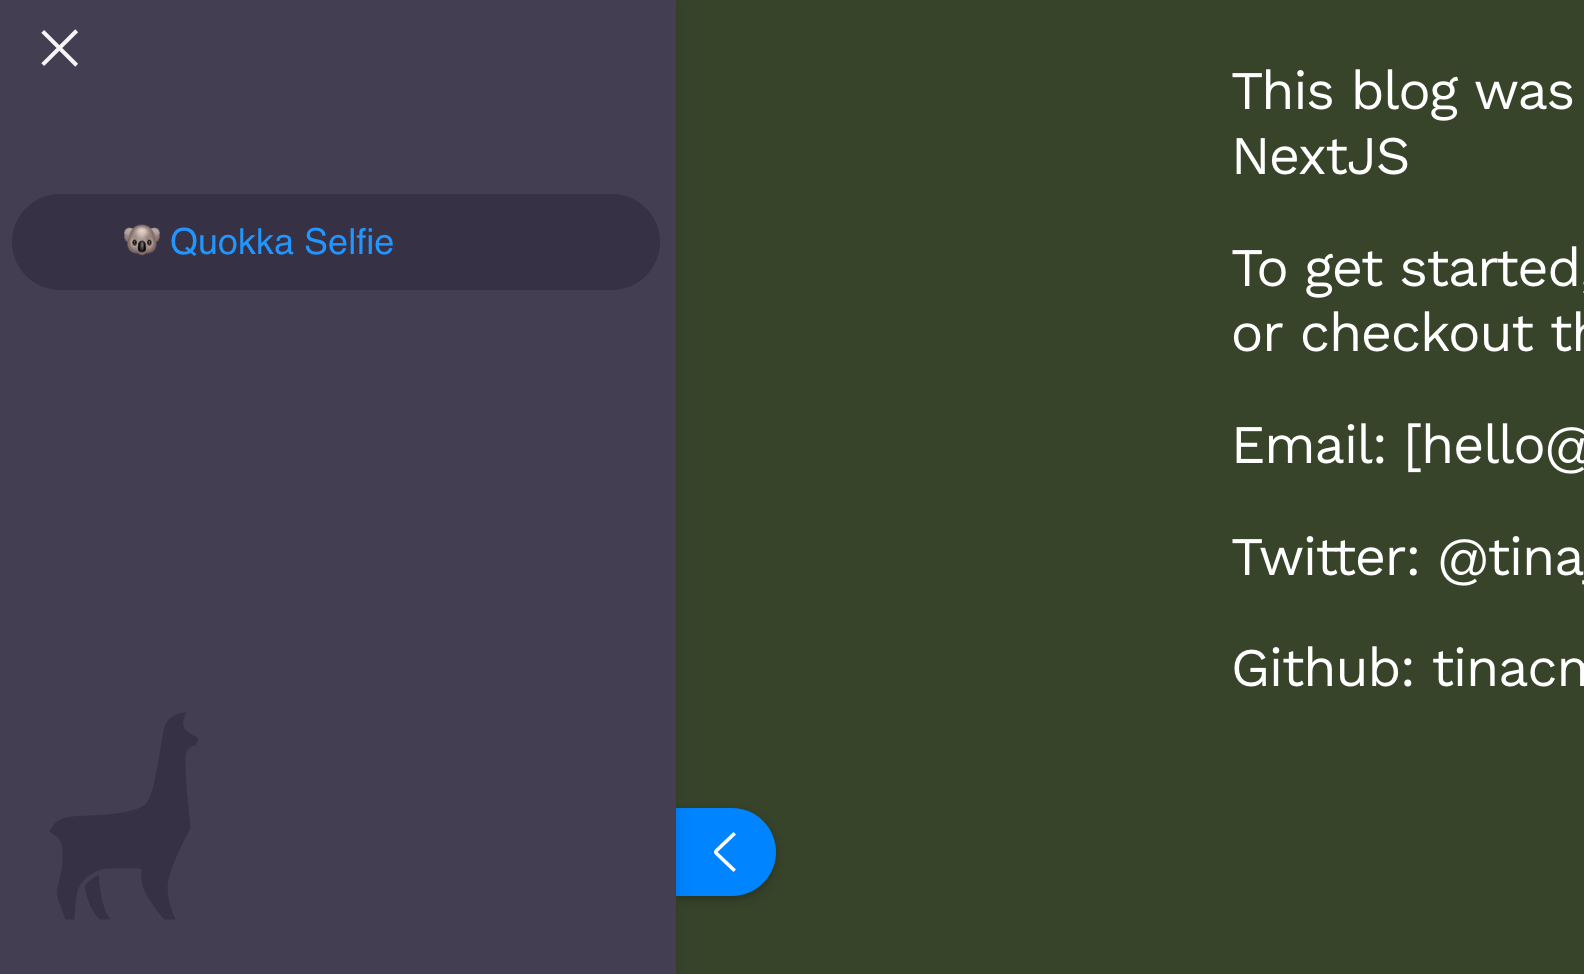
Let's see the selfie screen plugin in action. Using it will add a new item to the global menu.
Clicking on the menu item will open a popup modal where our Component will render.
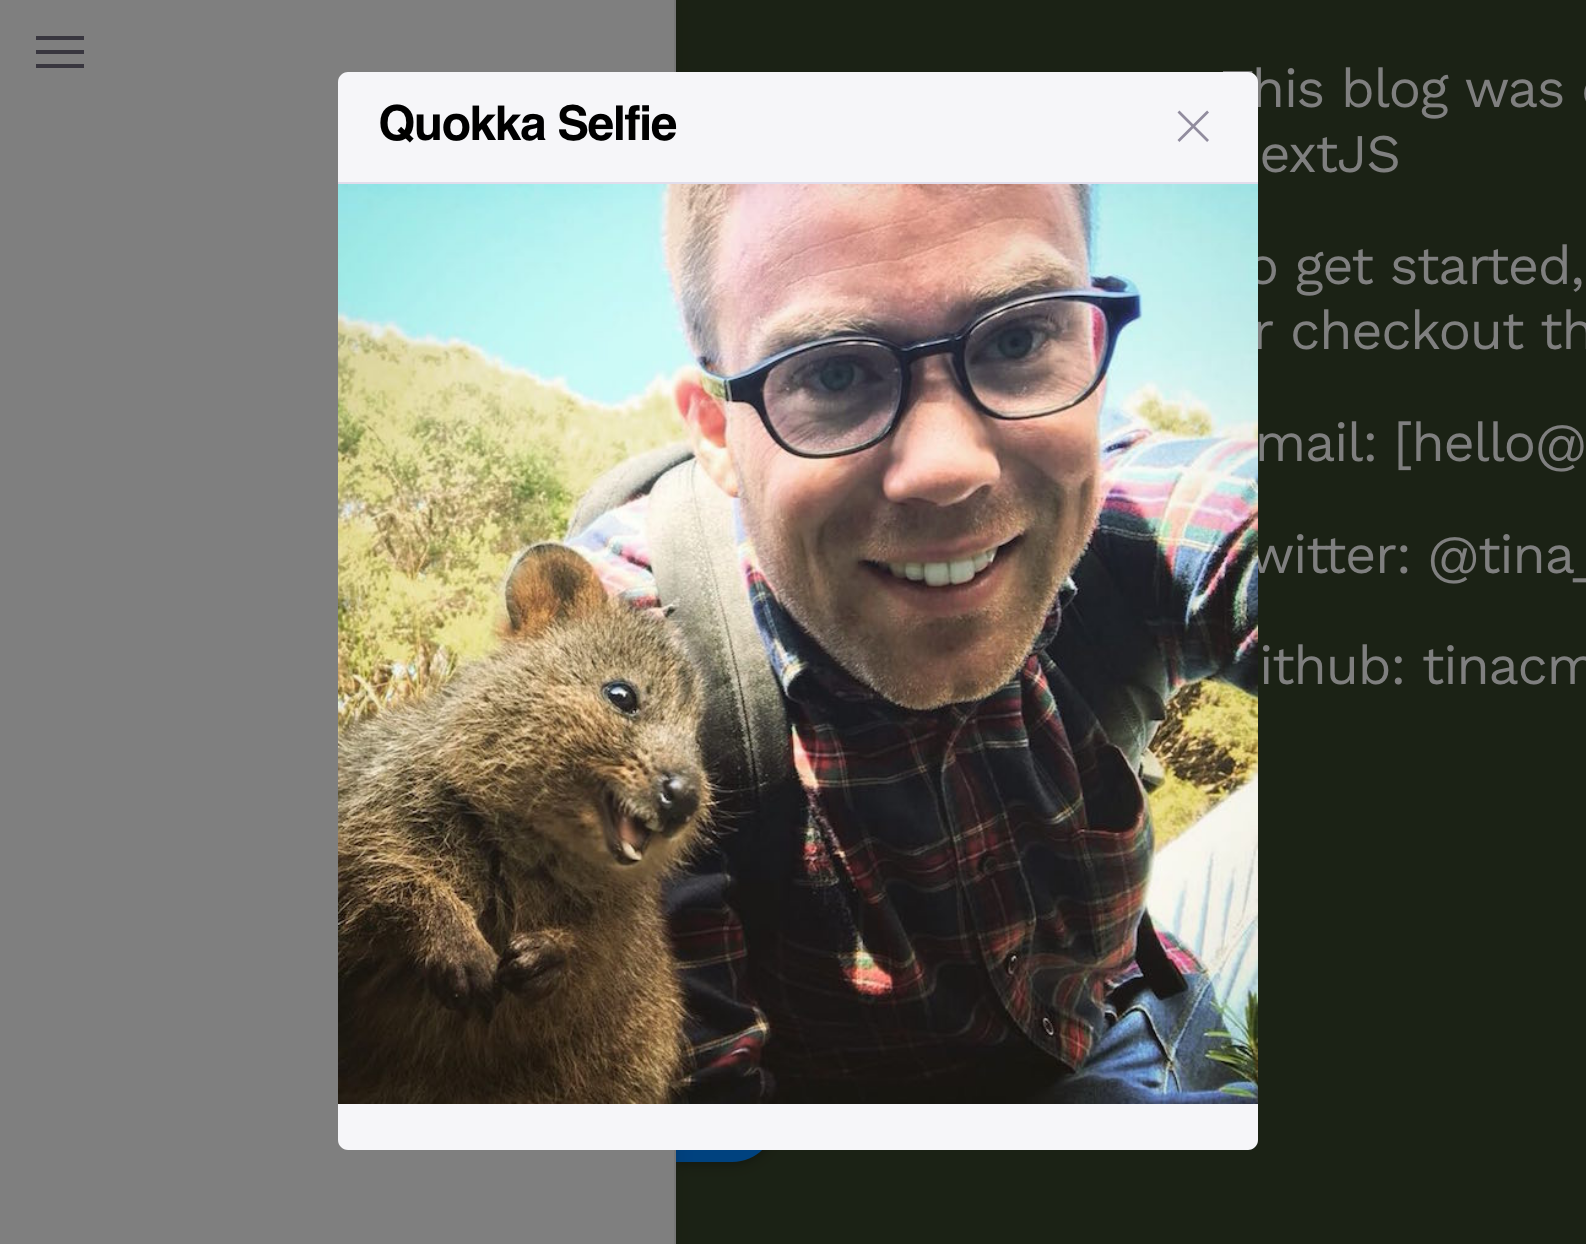
Tada! It works. We made a plugin to brighten everyone's day ☺️.
So what can I do with Screen Plugins?
Screen plugins are just React Components, so the screen plugin world is your oyster, so to speak. You could make magic 8 ball 🎱 screen plugin to help the content team decide where to order lunch. It's all deadly.
If nothing else, I hope this blog introduced you to quite possibly the happiest creature alive. We could all use a little quokka in our lives right now. Be well 🖖!