Creating Markdown Drafts with Gatsby
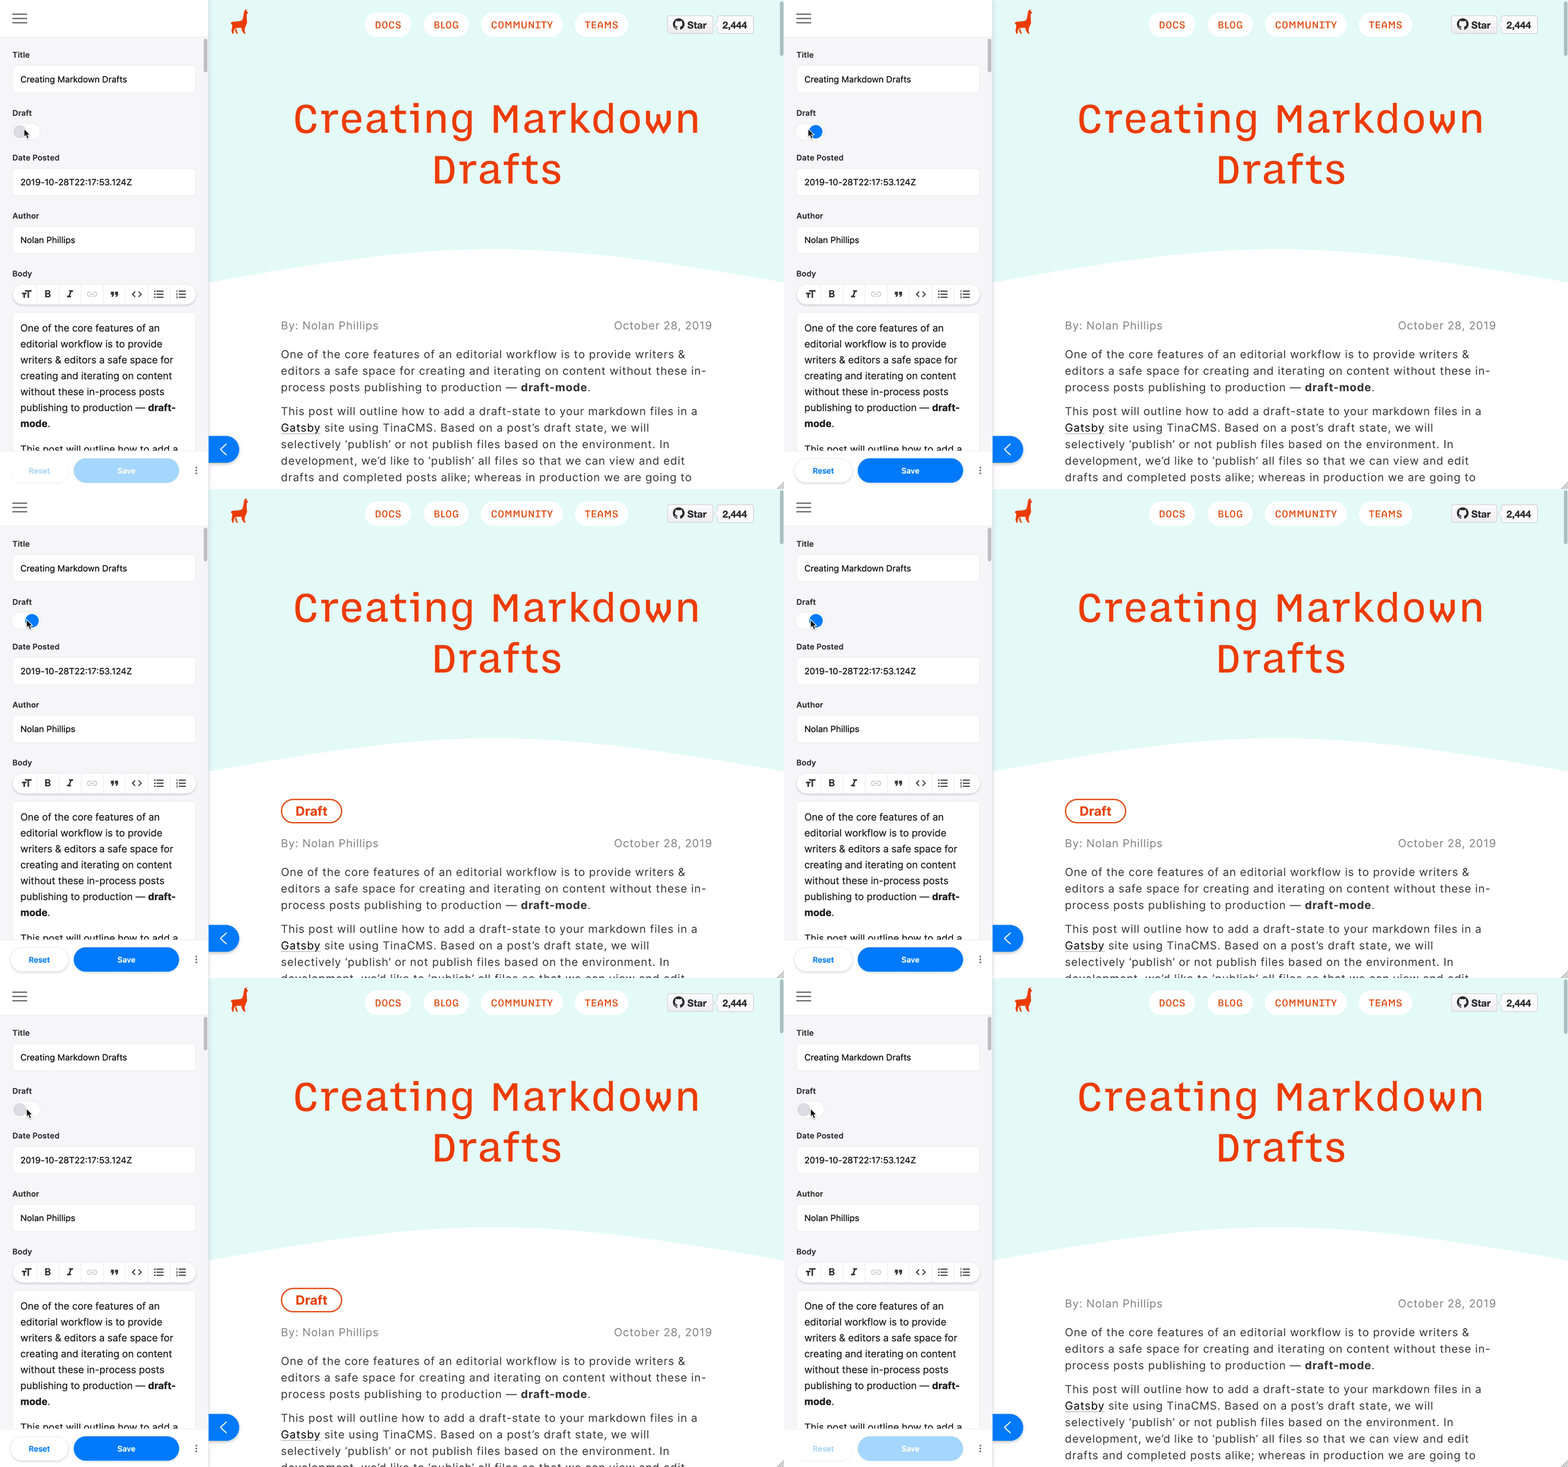
One of the core features of an Editorial Workflow is to provide writers & editors a safe space for creating and iterating on content without these in-process posts publishing to production — draft-mode.
This post will outline how to add a draft-state to your markdown files in a Gatsby site using TinaCMS. Based on the environment and the file's draft state, they will be selectively ‘published’ or not published. In development, we will ‘publish’ all files so we can view and edit drafts and completed posts alike; whereas in production we are going to filter out draft posts in our graphQL queries.
The code examples are based on the gatsby-starter-tinacms. Feel free to reference that as you go along.

Step 1: Add the published field to MarkdownRemark nodes
First off, we need to create a way to tell Gatsby what files to include (or not include) in the build process depending on the environment. To do this, we will add a published field to every MarkdownRemark node. The published field is the faucet from which files get included in the build process. In development mode, the faucet is fully open, and all posts, regardless of their draft state, will be ‘published’ or sent through the build process. In production mode, the faucet filters out anything in draft state. So think of the published as a sort-of misnomer for includedInBuild.
The first file we need to touch to do this is the gatsby-node.js file, which typically lives in the root of a site. This is a special gatsby file where we can access all of Gatsby’s Node-API’s, or access points to the GraphQL layer that processes all the data in a Gatsby site. The API we will use is called setFieldsOnGraphQLNodeType:
const { GraphQLBoolean } = require('gatsby/graphql')exports.setFieldsOnGraphQLNodeType = ({ type }) => {// if the node is a markdown file, add the `published` fieldif ('MarkdownRemark' === type.name) {return {published: {type: GraphQLBoolean,resolve: ({ frontmatter }) => {/*`published` is always true in developmentso both drafts and finished posts are built*/if (process.env.NODE_ENV !== 'production') {return true}/*return the opposite of the `draft` value,i.e. if draft = true : published = false*/return !frontmatter.draft},},}}return {}}
Step 2: Create only published pages
While we’re in the gatsby-node.js file, we need to prevent files in a draft state from being created as pages by Gatsby. We need to query for all the MarkdownRemark files, specifically with the published field data, so we can only create pages if they are published or set to be included in the build.
Let’s loop through all the posts and only call createPage for published content. This example code is using the createPages API, which is where you manipulate or handle the creation of pages in Gatsby.
exports.createPages = async ({ graphql, actions, reporter }) => {const { createPage } = actions// Query for markdown nodes to use in creating pages.const result = await graphql(`{allMarkdownRemark(sort: { fields: [frontmatter___date], order: DESC } limit: 1000) {edges {node {publishedfields {slug}frontmatter {title}}}}}`)// Handle errorsif (result.errors) {reporter.panicOnBuild(`Error while running GraphQL query.`)return}// Create pages for each markdown file.const blogPostTemplate = path.resolve(`src/templates/blog-post.js`)result.data.allMarkdownRemark.edges.forEach(({ node }) => {// if unpublished return, to prevent the page from being createdif (!node.published) return// otherwise, create the `published` pagecreatePage({path: node.fields.slug,component: blogPostTemplate,context: {slug: node.fields.slug},})}}
Step 3: Filter unpublished pages at the query level
Now that we have our published field controlling the flow of whether or not posts get included in the build, we need to adjust the queries in our templates and index list files so that we only query for published data.
Go to the component or page file that renders a ‘list’ of all posts — this could be an index file on a simple blog, or a list page file on a more complicated site. In that file, let’s add a filter parameter to the allMarkdownRemark query:
src/pages/index.js
export const pageQuery = graphql`query {// Only query for published markdown filesallMarkdownRemark(filter: { published: { eq: true } }, sort: { fields: [frontmatter___date], order: DESC }) {edges {node {excerptfields {slug}frontmatter {date(formatString: "MMMM DD, YYYY")titledescription}}}}}`
Same goes for the query in the blog-post template.
src/templates/blog-post.js
export const pageQuery = graphql`query BlogPostBySlug($slug: String!) {// Unpublished pages will 404markdownRemark(published: { eq: true }, fields: { slug: { eq: $slug } }) {// ...}}`
Now our templates and components dealing with any blog post data will conditionally handle published content depending on the build environment.
Step 4: Add a "draft" indicator in development
Since you’re already in your blog-post.js template file and you have added the filter parameter, we now need to add the ‘draft’ field to our query so we can conditionally render some indication of the post status in the component. You may need to restart the Gatsby dev server after adjusting this query.
Add the draft to your blog-post.js query:
export const pageQuery = graphql`query BlogPostBySlug($slug: String!) {markdownRemark(published: { eq: true }, fields: { slug: { eq: $slug } }) {frontmatter {titledate(formatString: "MMMM DD, YYYY")description// The new fielddraft}}}`
There’s lots of ways you can incorporate the ‘draft’ indicator status into your component. One way would be to conditionally render draft status instead of the date, based on the value of frontmatter.draft, as shown in the example below:
<pstyle={{...scale(-1 / 5),display: `block`,marginBottom: rhythm(1),}}>{post.frontmatter.draft ? <DraftIndicator /> : post.frontmatter.date}</p>
Step 5: Add the Draft Toggle to your Form
Finally, let’s add this draft toggle field to the form, where we edit our blog posts with TinaCMS. Simply add this field to each page's form definition.
{name: "frontmatter.draft",component: "toggle",label: "Draft",},
Note:
Tina will only add the draft frontmatter value to files after it's been edited. If the draft frontmatter value is not set on a file, it will be null (falsy)and will get published in all environments.
That’s it!
We successfully added ‘draft-mode’ to a simple blog. Now this configuration might look slightly different depending on your site, but feel free to reference the TinaCMS-site repo, specifically the blog template, to see this feature in action on a more complicated site.